About integration data pulling
Getting your products, orders, and fees from your online store into the app starts with a pull — and knowing how that pull works makes it much easier to spot and fix any matching issues when they arise.
In this article:
- Connecting an integration
- Choosing a start date
- Disabling automatic data pulls
- Marking pulled orders as shipped automatically
- Setting a default location for pulled orders
- Automatic updates
- Manual data pull by date range
- Temporarily pausing an integration
- How products are matched during a pull
- Relinking a listing to a different product
- FAQ
Connecting an integration
To connect your online store as an integration, sign in to your account, click on the settings menu on the top right, next to your notifications, and choose Integrations.

For example, you can have multiple Etsy shops connected through our Etsy integration or various Shopify stores connected through our Shopify integration. There are currently no limits on how many shops or stores you connect through the integrations, but the amount of integrated stores you can have depends on your subscription.
Note: Trial accounts can pull a maximum of 1 month of data. Subscribers can pull a maximum of 365 days of data for each integration.
Choosing a start date
To set a specific date to pull your sales data from, you'll want to set your Account Start Date before you connect your e-commerce platform. The pull will then use this date as the earliest date to pull your data.
If you want to change your start date and already have integrations in place, you'll want to disconnect these to remove all pulled data, change your account start date, and reconnect the stores. This will ensure that only data from the nominated start date will be pulled into your account.
After the initial pull, you can select a specific period to pull your orders and fees by running a manual pull. To change your start date after you have already pulled, you'll want to disconnect your integration to remove all data, ensure your Account Start Date is set correctly, and then reconnect the e-commerce platform.
You cannot pull data more than 365 days ago — if you need to backdate further than this, please contact us to discuss options.
Disabling automatic data pulls
It is possible to turn off the daily automatic data pulls if you would rather pull your latest orders and purchases manually. This can be useful when you need to continuously baseline your stock levels daily before pulling your latest data.
To switch off automatic daily pulls for an integration:
- Go to your Integrations page
- Click the integration you'd like to set this setting for
-
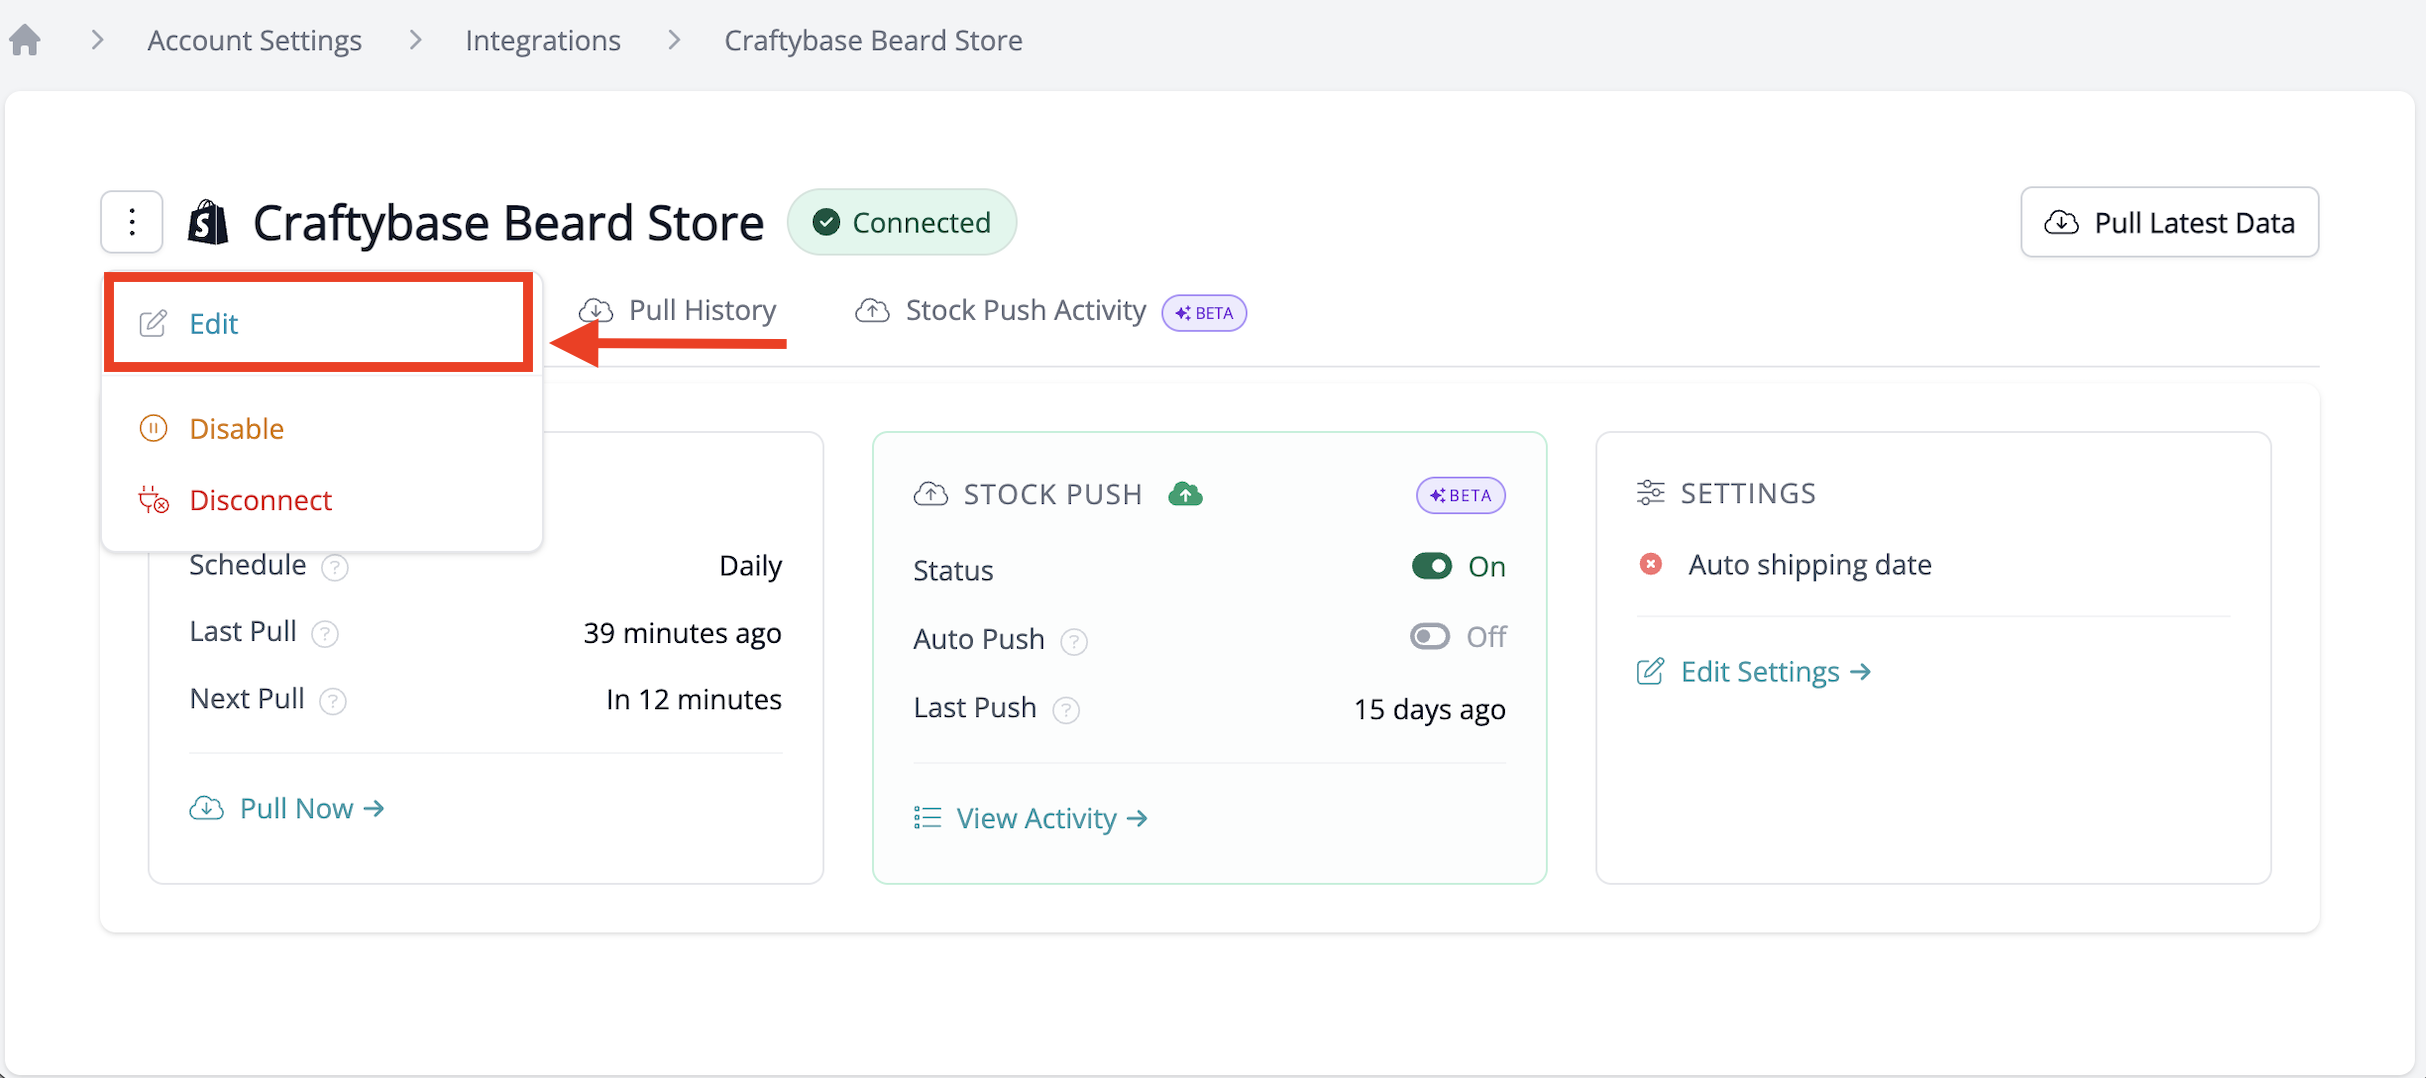
On the integration page, hover your mouse over the vertical ellipsis and select Edit.
-
Uncheck the box called Automatic Updates
- Click the Save button.


Manual pulls can only be run for a maximum date range of 30 days.
Marking pulled orders as shipped automatically
If you sell in person via a POS or have another situation where your orders need to be marked as "shipped" instantly, you can set your integration to do this automatically.
To mark pulled orders with an automatic shipped date for an integration:
- Go to your Integrations page
- Click the integration you'd like to set this setting for
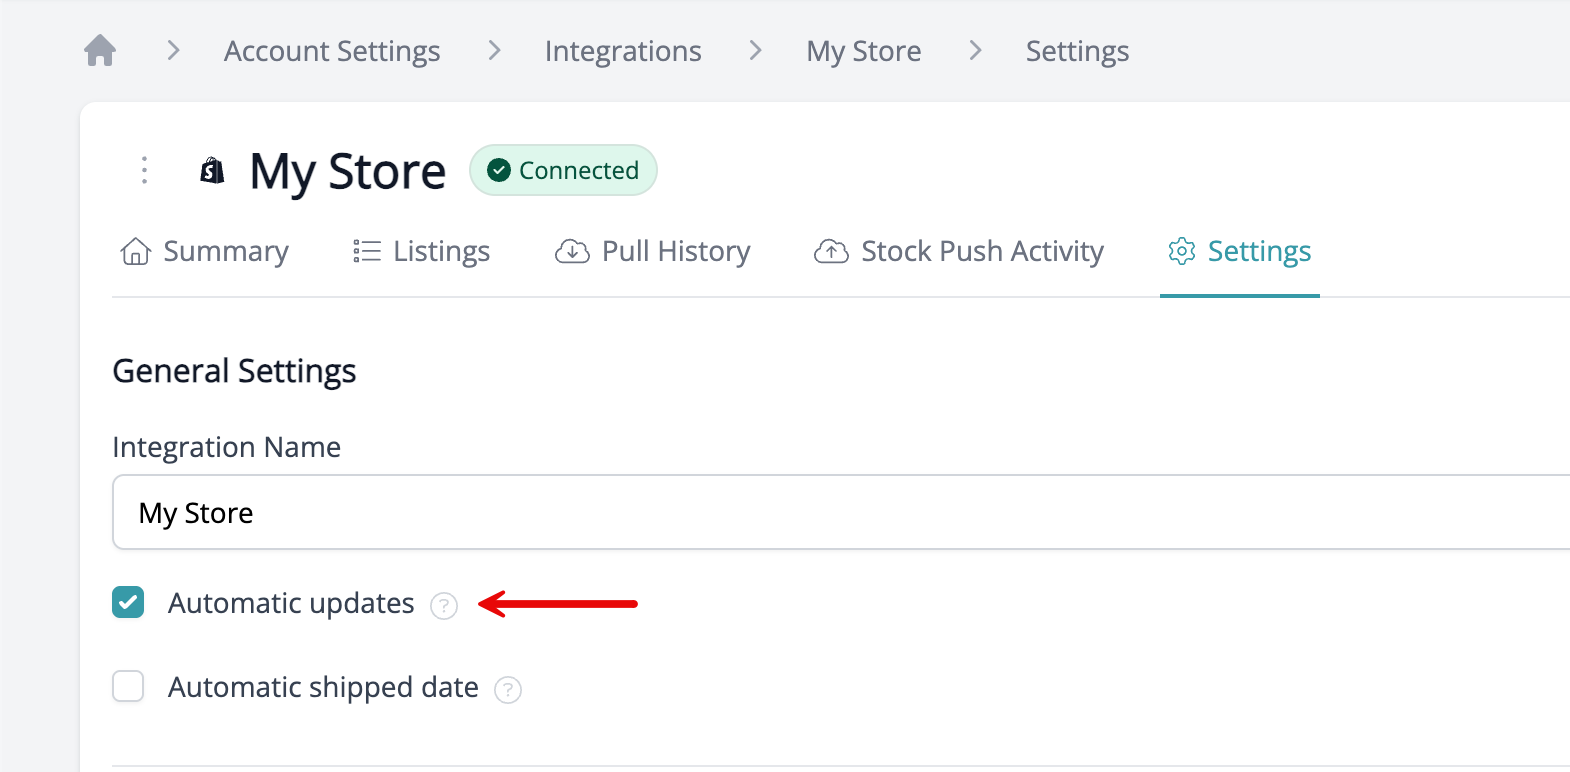
- On the integration page, hover your mouse over the vertical ellipsis and select Edit.
- Check the box called Automatic Shipped Date
- Click the Save button.

For future orders, the shipped date will automatically be saved as the date the order was placed. If a shipped date differs from the date found in the integration in a future pull, the date found in the integration will be used instead.
⚠️ Heads up about editing orders
If you manually change details on an order from an integration in the app, such as the shipping date, products, or totals, these changes will be overwritten the next time your account pulls data from the sales channel.
To keep your edits, we recommend copying the order, making your changes on the duplicate, and then deleting the original order. You can learn how to copy an order in this article.
Setting a default location for pulled orders
On eligible plans, nominating a location for all orders pulled from an integration is possible. This can be useful for warehousing situations such as Amazon FBA.
To set a default location for all orders pulled from a specific integration:
- Go to your Integrations page
- Click the integration you'd like to set this setting for
- On the integration page, hover your mouse over the vertical ellipsis and select Edit.
- Search for your location in the search box called Location (if you need to add a new location, instructions for this step can be found here)
- Click the Save button.
Automatic updates
Your plan will determine if your integration will pull data automatically.
Studio: Daily data pull
Indie: Daily data pull
Business: Hourly data pull
Growth: Hourly data pull
The automatic pull will pull new data since the last data pull was performed, and will also check for any changes to your orders (i.e., shipped status, adjustments, and refunds).
Manual data pull by date range
If you wish to pull data between automatic updates, you can manually pull your data at any time.
Manual pulls can only be run for a maximum date range of 30 days.
To manually pull from an integration:
- Go to your Integrations page (How do I find my Integrations page?)
- Select the integration for which you will be pulling data from.
- Click on the "Pull Now →" option next to the store you would like to pull from manually.
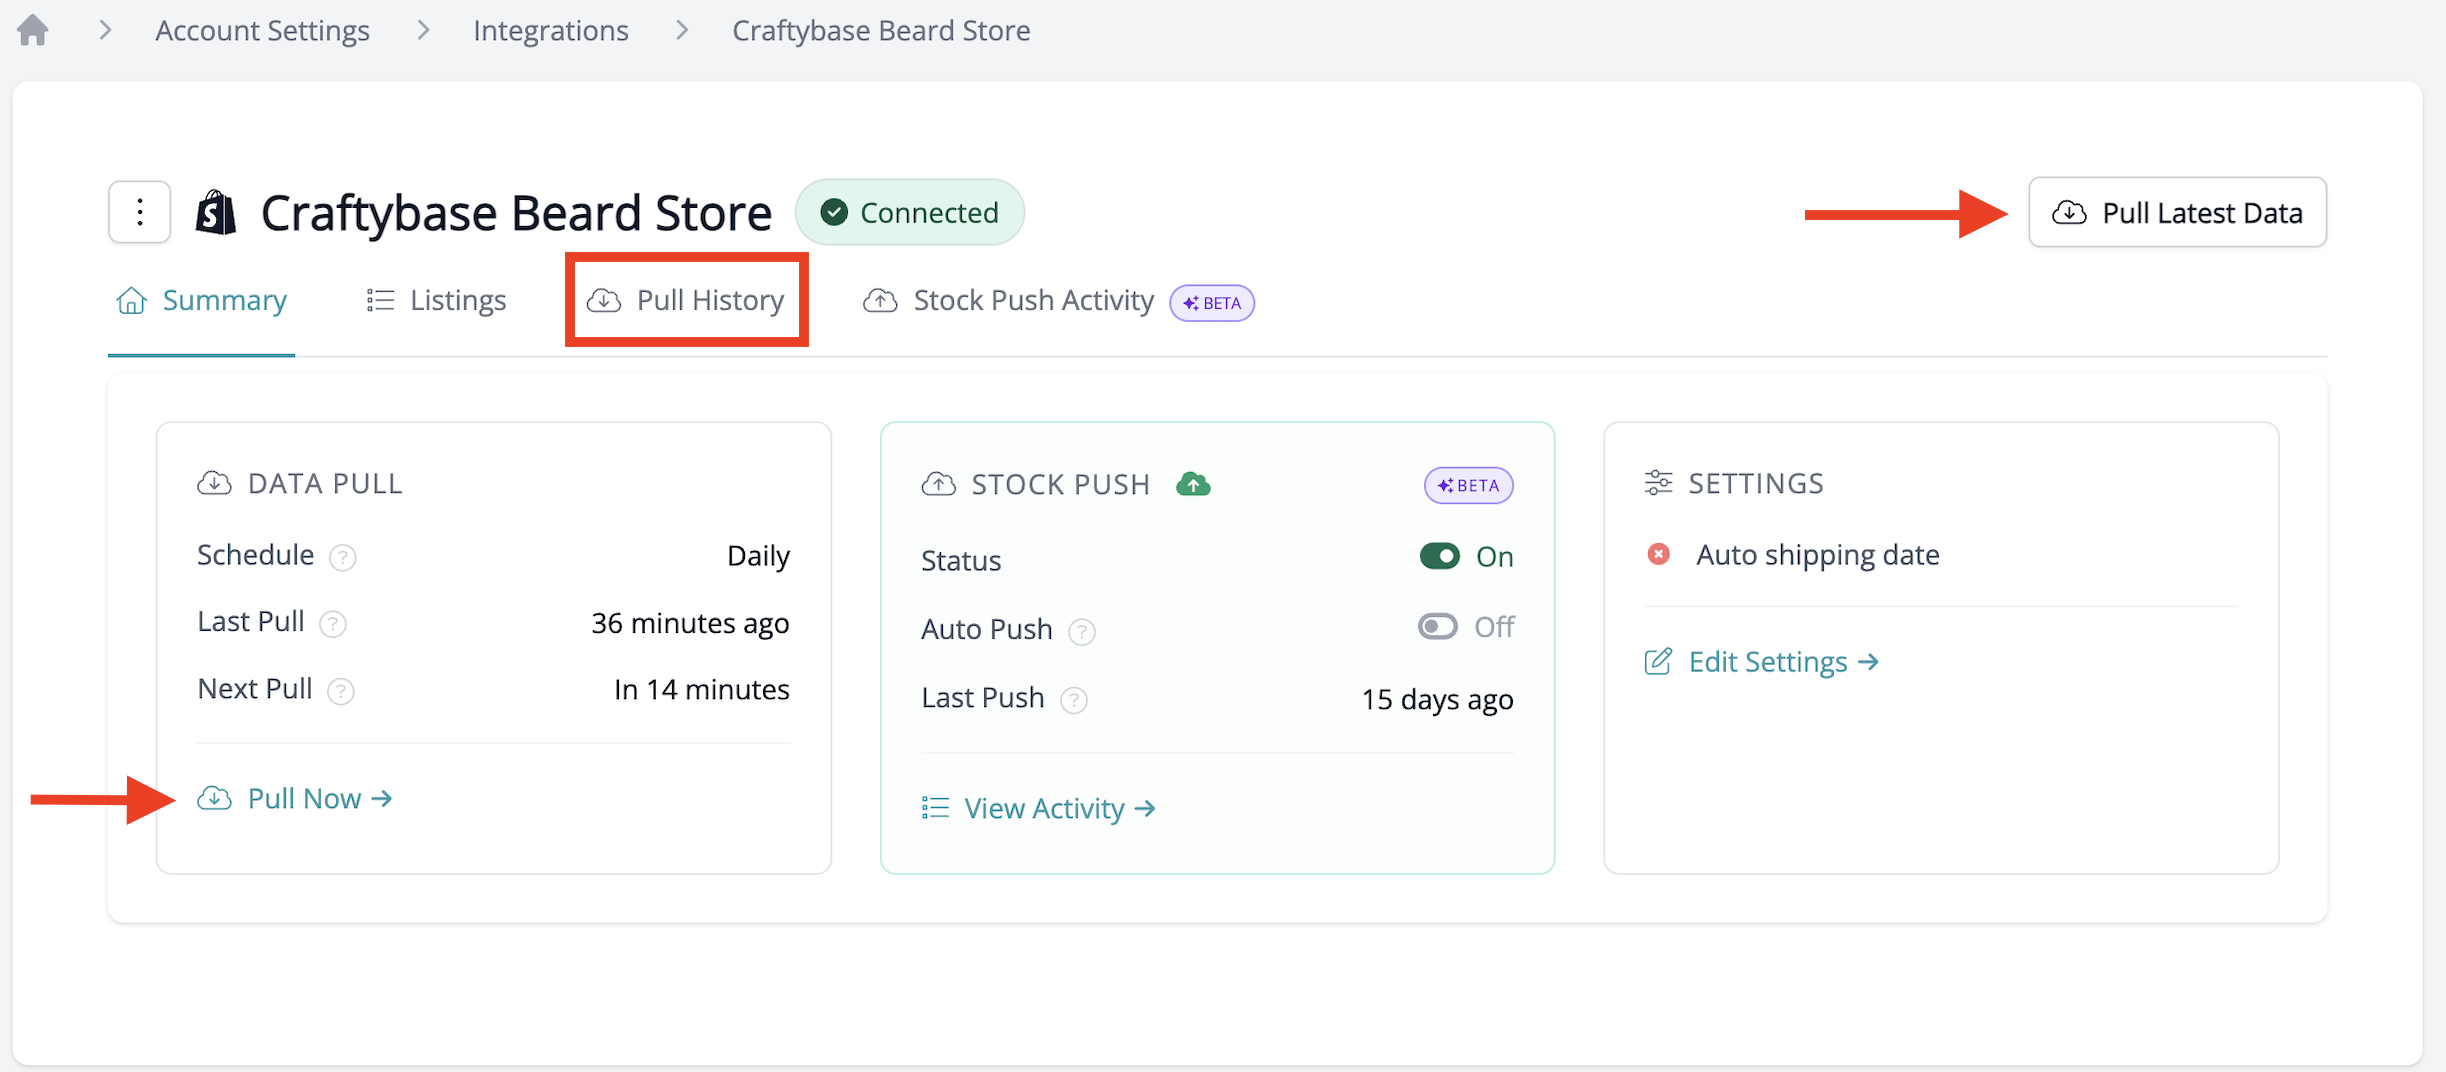
- On the pull data form that appears, select the date range you wish to pull data. If you are doing a full backdate after subscribing, choose the date you first opened your shop here to ensure all past data is pulled into the app.

- Click the Pull Data button to start the data pull process.
If an order or purchase has been manually removed from the app and a manual pull is run for the date range containing the removed order or purchase, the order/purchase will be recreated and must be manually removed once again.
Temporarily pausing an integration
If you need to temporarily stop an integration from pulling data, you can disable the integration instead of deleting it using the steps below:
Disabling an integration will:
- Pause all scheduled imports
- Keep all historical data intact
- Allow you to re-enable the integration at any time
This is useful if you want to pause importing while you baseline inventory, troubleshoot listings, or prevent duplicate order pulls without losing your integration history.
To disable an integration:
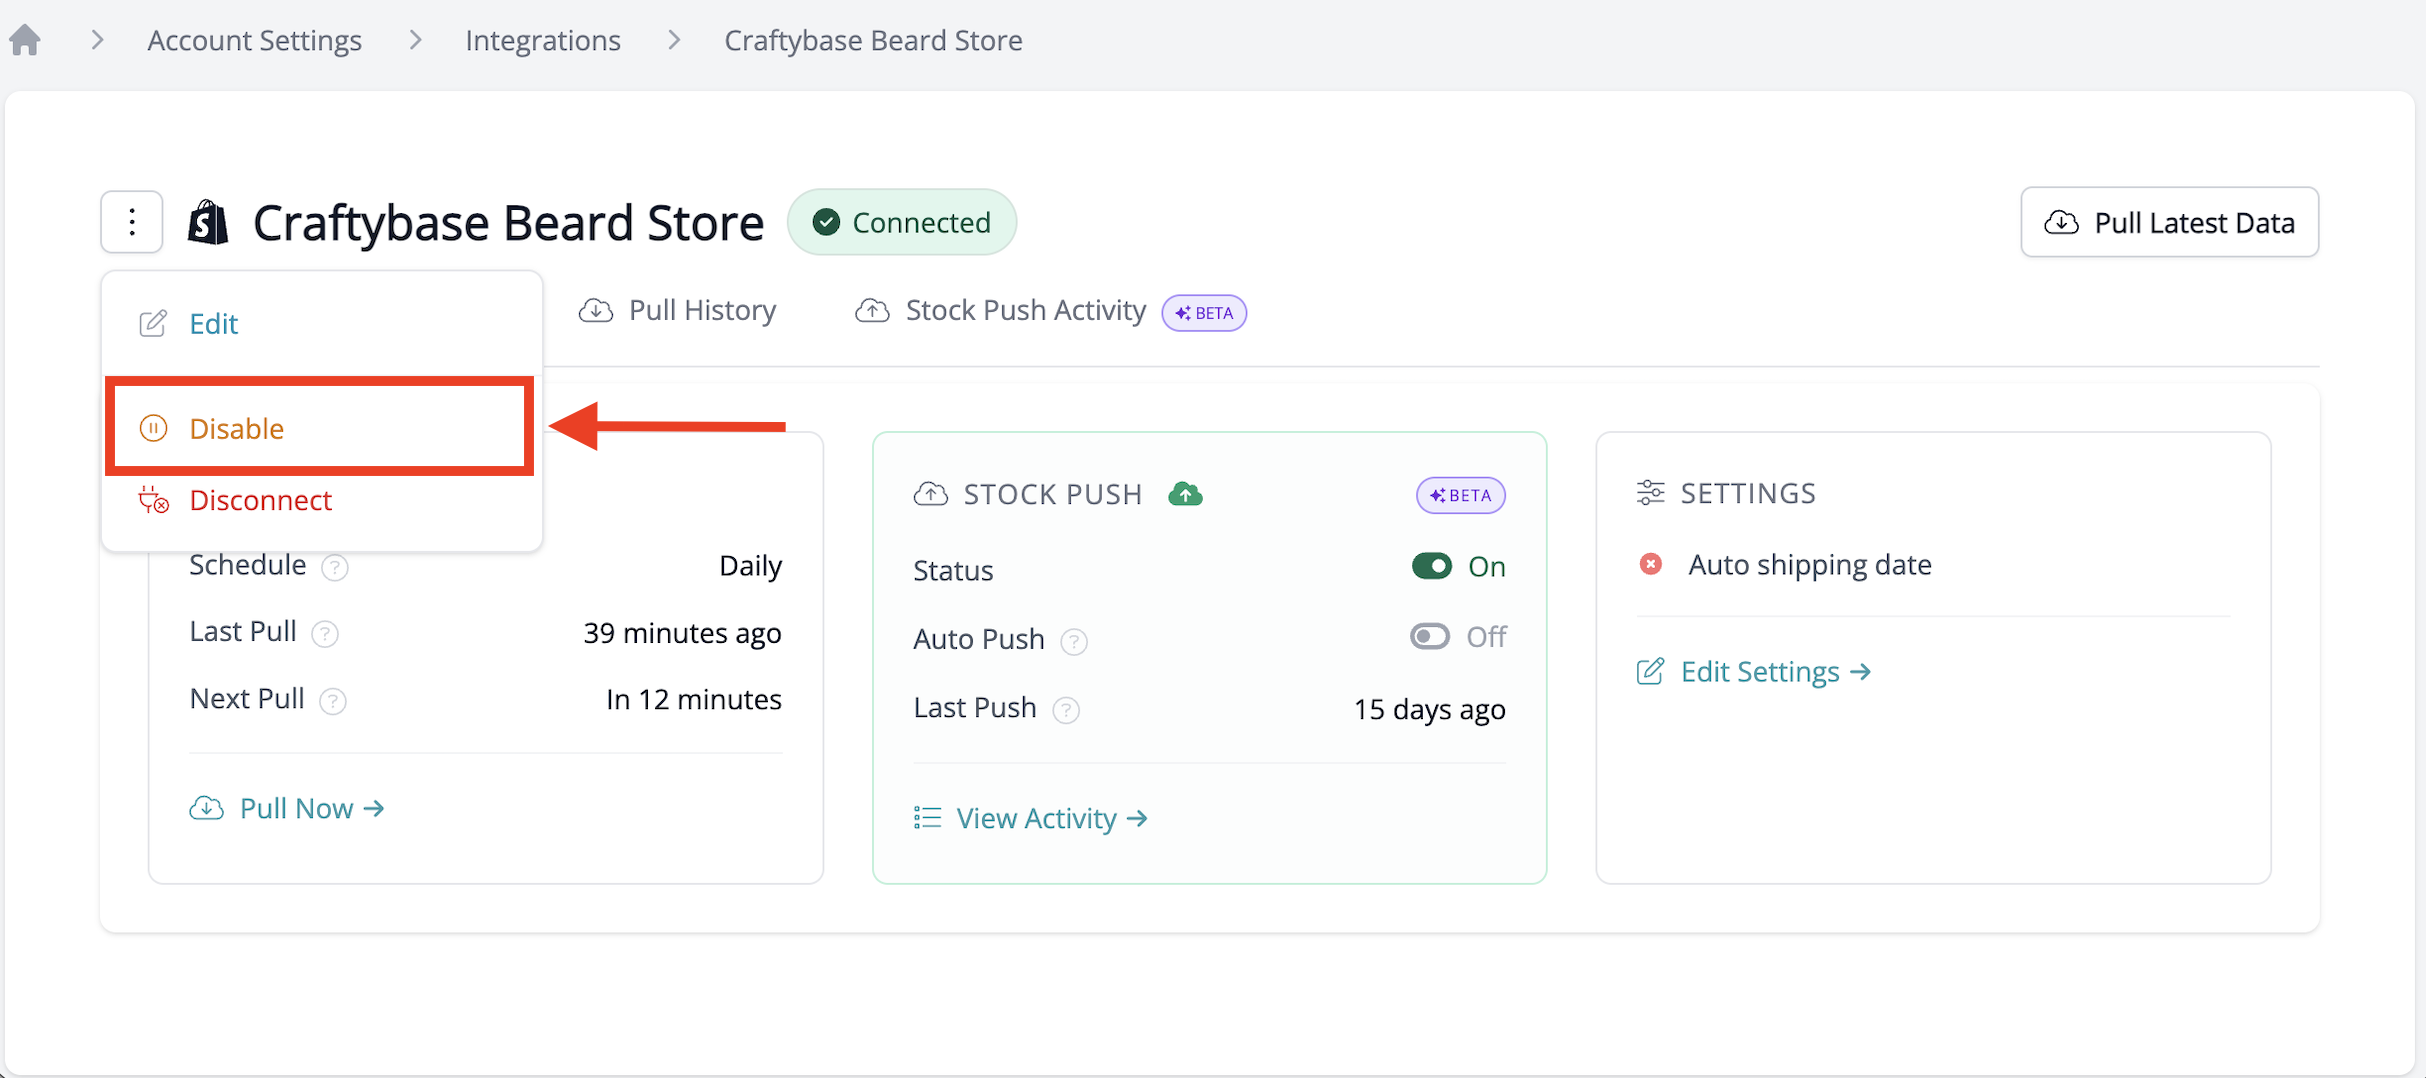
- Go to your Integrations page
- Click the integration you'd like to pause
- On the shop detail page, click the ⋮ dots next to the store name
- Click "Disable"
- Confirm the changes
Once disabled, the shop will show a Paused status and will not pull any new data until it is re-enabled.
How products are matched during a pull
When the app pulls data from your sales channel, it needs to decide whether each incoming product already exists in your account or whether to create a new one. The matching rules differ depending on whether your channel product has multiple variants or just a single default variant.
The matching rules below apply to Shopify, Etsy, WooCommerce, Square, Wix, and Faire. Squarespace always matches on product title regardless of variant count — see the FAQ below for details.
Products with multiple variants
When a channel product has two or more variants (for example, a candle in multiple scents or sizes), the app matches the base product using the product title. If a product with that exact title already exists in your account, the pull links to it. If no match is found, a new product is created.
Why title and not SKU? Variant-based products share a single parent title across all their variants. There is no single SKU that uniquely identifies the base product, so the title is the most reliable match point.
Products with only a single (default) variant
When a channel product has no custom variants — just a single default listing — the app matches using the SKU first. If a product with that SKU exists in your account, the pull links to it. If no SKU match is found, the app falls back to matching on title. If there is still no match, a new product is created.
If the matched or newly created product has a blank SKU field, the app will populate it from the channel listing's SKU automatically.
How variants are matched once the base product exists
After the base product is matched or created, the app matches each individual variant against existing listings in your account. It first looks for a listing with the same external variant ID (the unique reference ID from the channel). If that doesn't find a match — for example, on an initial pull before those IDs have been recorded — it falls back to matching by the variant's attribute values (such as Colour: Red, Size: Large).
If no match is found for a variant, a new variation listing is created under the base product.
The external reference ID from your sales channel is always used as the long-term anchor for each listing. This is why relinking a listing to a different product (see below) works reliably — future pulls use the external ID, not the title or SKU, to route orders and expenses to the correct place.
What happens with duplicate or mismatched products
If two products in your account share the same title or SKU, the app will link the pull to whichever match it finds first. This can result in orders and stock being attributed to the wrong product. If you notice this happening:
- Check for duplicate product titles or SKUs in your account under Products
- Merge duplicates using the merge products feature
- Or relink the affected listing to the correct product (see below)
Title and SKU matching only applies on the initial pull. Once a listing has been matched and given an external variant ID, all future pulls use that ID — not the title or SKU. This means renaming a product in the app after the initial pull will not cause it to re-match to a different product.
Relinking a listing to a different product
If a listing has been matched to the wrong product — or you want to restructure how your channel products map to your inventory — you can relink any listing to a different product and variation at any time.
To relink a listing:
- Go to Integrations and open the integration the listing belongs to
- Find the listing in the listings list and click on its name to open the listing page
- Click the Move button at the top right of the listing page
- On the Relink Listing page, use the Product search to find and select the correct product
- Select the correct Variation from the dropdown (this populates after you select a product)
- Click Save
The relink takes effect for all future pulls. Existing orders and expenses that have already been pulled will not be moved — only new data pulled after the relink will route to the new product.
You can only relink a listing to a product and variation that belong to your own account.
Troubleshooting integrations
Running into issues with your integration pull? See our dedicated troubleshooting guides:
FAQ
Below are some common questions we receive about our integrations.
How does the app sync with external integrations and sales channels?
The app supports pushing stock levels back to Shopify and Etsy using our Stock Push feature.
For the other integrations, it performs a one-way data pull by pulling data from your connected sales channels on an hourly or daily basis (depending on your plan), including:
- Orders: Details of sales transactions, including products sold, quantities, and prices.
- Listings: Product listings, including SKUs, titles, and other relevant product details.
- Fees: Some of the applicable sales channel fees associated with your transactions.
Why does Squarespace always match on product title, even for single-variant products?
Squarespace's API does not flag whether a product has a single default variant in the same way Shopify and Etsy do. As a result, the app uses the product title as the match point for all Squarespace products, regardless of variant count. If you have two Squarespace products with the same title, the pull will link to the first match found — check for duplicate titles under Products and rename or merge as needed.
Why did my channel product create a new product instead of matching an existing one?
This usually means the match criteria weren't met at the time of the initial pull. For a single-variant product, check that the SKU on your channel listing matches the SKU on the product in the app exactly (including capitalisation). For a variant product, check that the product title matches exactly. If a new product was created in error, you can merge it with the existing one, then relink the listing to the correct product.
Can I change which product a listing is matched to?
Yes — use the Relink listing feature described above. Once relinked, all future pulls will route that listing's orders and expenses to the new product. Existing historical data will not be moved.
Need more information?
Please check out the following articles.