Importing materials
Bring your materials into your account easily with our import options
In this article, we'll cover:
- What you'll need to import your materials
- Importing into the app
- Creating a CSV file
- Undoing a material import
What you'll need
- Any plan that allows the importing of materials
- A CSV file to import
Importing into your account
To upload your CSV file (How do I create a CSV file for my materials?):
- Go to your Materials page.
-
Click the Bulk Import button in the page header toolbar (next to the Add Material button).

-
On the form that appears, click the Choose File button and select your spreadsheet from your file system.
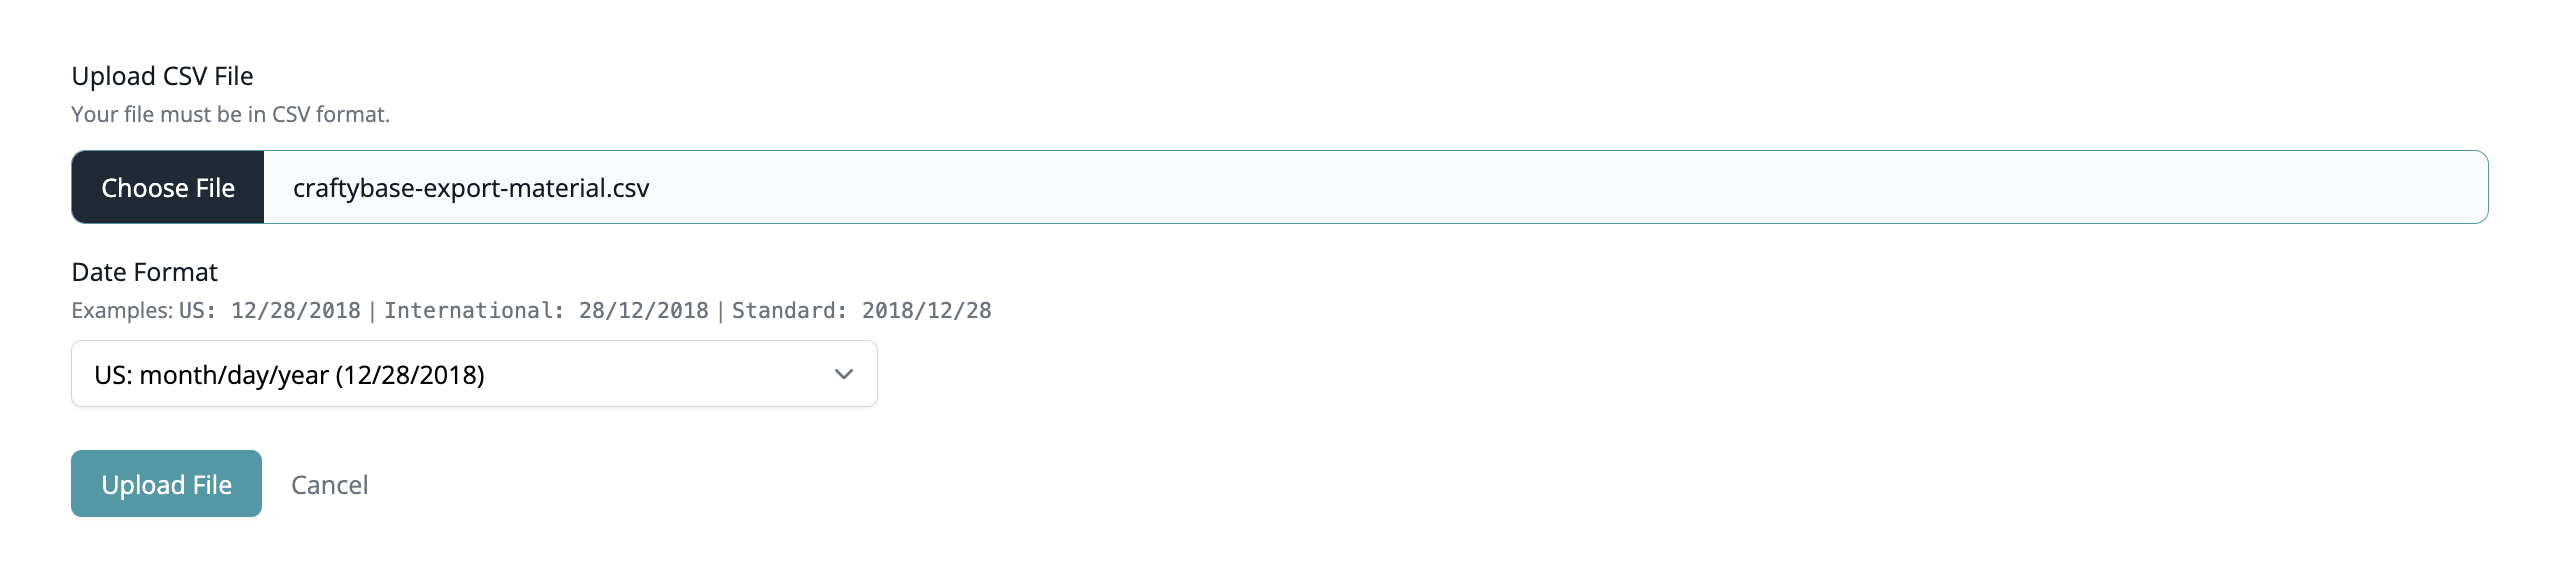
- Click the Upload File button. This will upload the file to the app, but we will still need to import the data — this will be done in the next step.
-
On your Mappings page, you'll need to confirm which field is represented by each column in your spreadsheet if you have changed these from the example spreadsheet above. Once you are happy with all fields, click the Yes, Import File button at the bottom of the page.

-
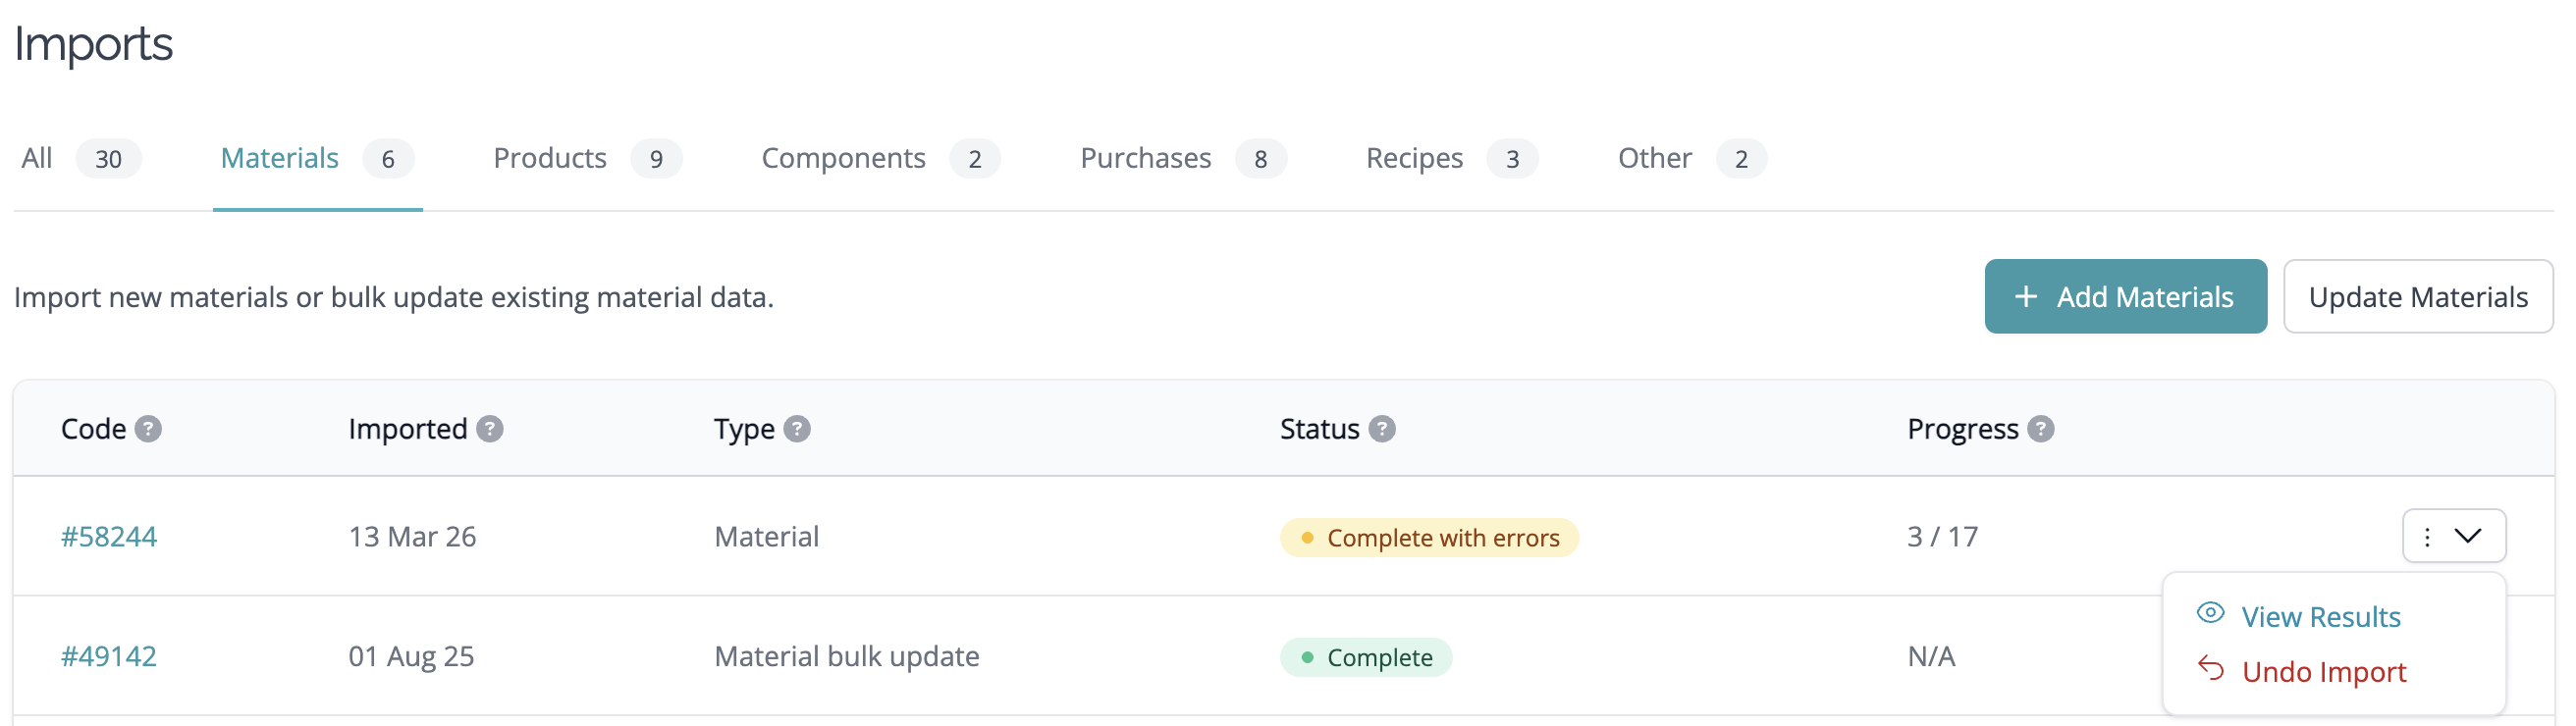
Your import will begin, and you'll be taken back to the Imports page. You'll see your import status as Importing. Refresh the page to see the updated status — when complete, it will show as Complete. Click the View Results / Undo button to see which Materials have been imported, along with details about any skipped rows (if any).
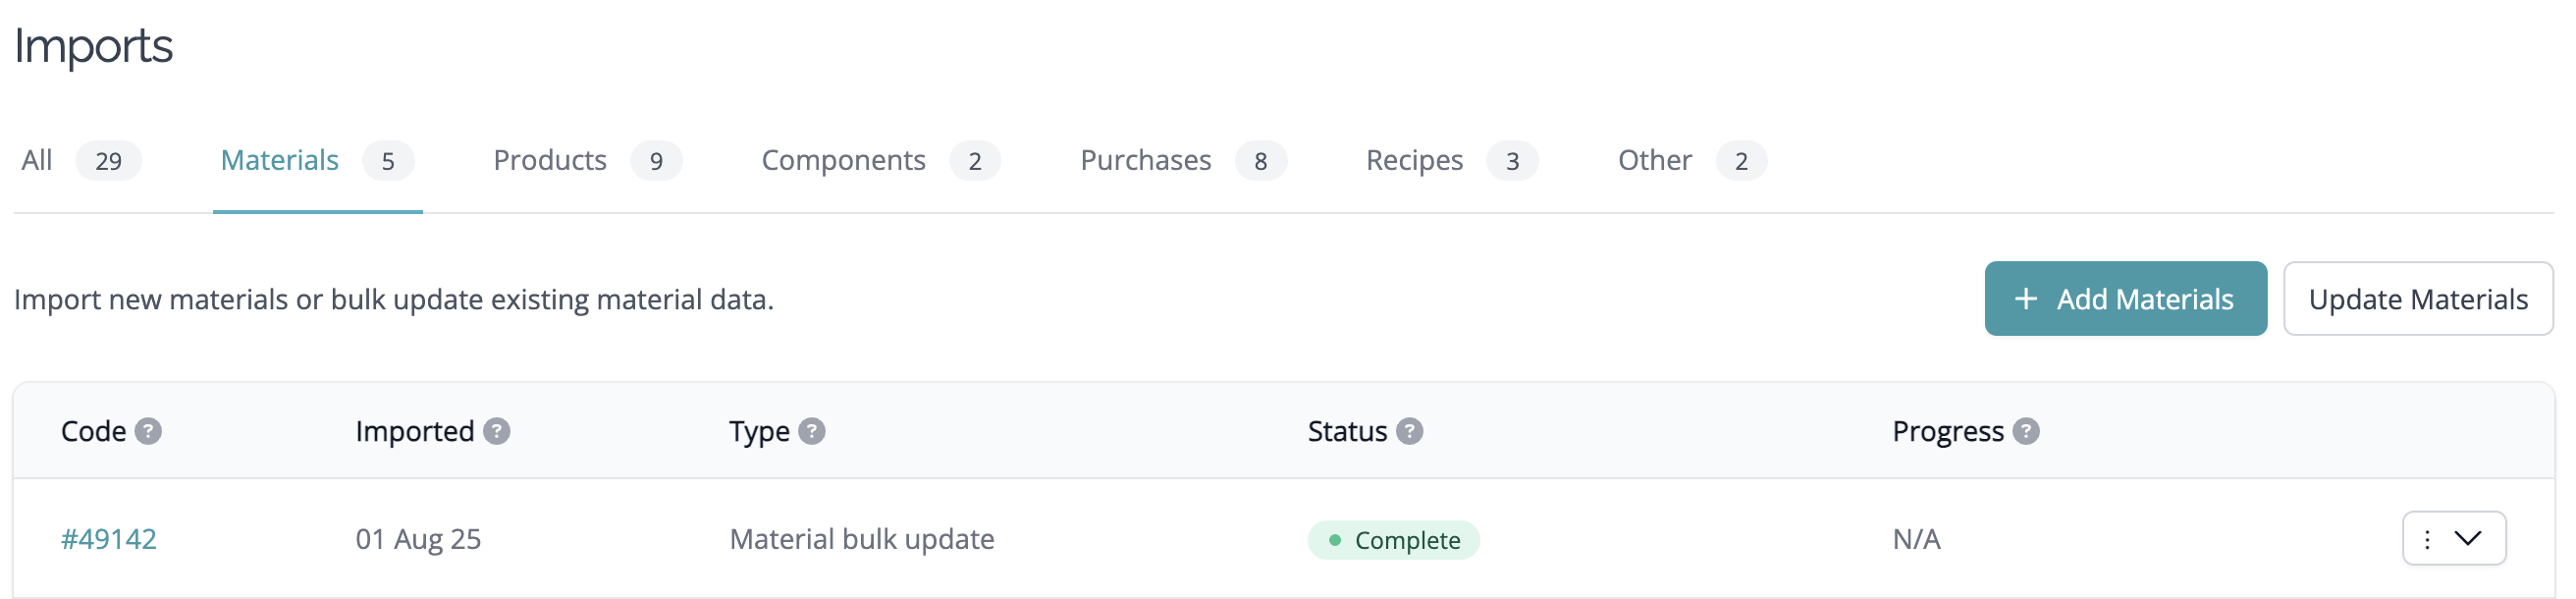
- On the details page, you'll find an option to Undo Import if you aren't happy with the results. Clicking this will remove all materials linked to the import and then delete the import record.


You can also start an import from your Imported Files page. (How do I find my Imports page?) Select the "New Import" option and select "Materials" from the dropdown menu.
Creating a CSV file
A CSV file is a Comma-Separated Values file that can be generated easily from any spreadsheet program.
Step 1: Download the Template Spreadsheet
We will need your data in a fairly standard format for our importer to be able to read the information properly, so please download and use our example spreadsheet as a starting point.
To download the file, go to your Materials page and click the Bulk Import button in the page header. This will take you directly to the import page where you can download the template.
Alternatively, you can download the spreadsheet directly from this link: Material Bulk Import Spreadsheet (CSV)
The file above is in CSV (Comma Separated Values) format, which can be opened in any spreadsheet program (Excel, Mac Numbers, Google Sheets).
Step 2: Add your materials to the spreadsheet.
Ensure that you add each material on a separate line. Please note that this importer is not for purchase information, only the attributes of the materials.
NOTE: Only Inventoriable materials can be added via the bulk import process.
| SKU |
[optional] Your SKU is your unique code identifier for the material. NOTE: Material rows will be skipped if there is already material with this SKU on your list, so please ensure that all codes are unique. |
| Name | This title will appear in all list views in the app and will typically be how you search for the material. It should ideally be unique enough to identify the material. If an item name isn't found for the row, it will be imported as "Untitled." |
| Description |
[optional] The longer descriptive text for the material. This is also searchable in all search boxes. |
| Category | [optional] The category for this material (i.e., "buttons"). If you don't yet have a category with this name in the system, we will create it when you import it. |
| Starting Quantity | If you wish to bring stock from your prior inventory tracking system, you can enter the number in your inventory on your start date in the app. If not present, it will default to 0. The largest quantity possible is 9999999. |
| Starting Unit Cost | If you'd like to bring stock forward from your prior inventory tracking system, you can enter the calculated unit cost of your material stock on hand for your start date in the app. Your unit cost will need to be in the same unit as your Tracking Unit (e.g., if you purchase in "jar" and track in "button," then this would be the per button price). If not present, it will default to 0.00. |
| Tracking Unit | This should be the unit in which you wish to track and manufacture the material. This can differ from your purchase unit if you set a different Purchase Unit (below). If not present, it will default to "item". For more information on Tracking Units, please see What is a Material Tracking Unit? |
| Purchase Unit | This is the unit you typically purchase in. It can be the same as your Tracking Unit. If not present, it will default to "item". For more information on Purchase Units, please see What is a Material Purchase Unit? |
| Purchase to Tracking Unit Conversion |
Your Purchase to Tracking Unit Conversion allows you to nominate the number of tracking units in a single purchase unit. This information allows the app to calculate the correct amount to increase your stock when you add a new expense and enter the purchase quantity. More information on how this works can be found here: How does the Purchase to Tracking Unit Conversion work? If not present, we will attempt to calculate this for you using the tracking and purchase unit specified. The largest value possible for this field is 9999999. |
| Low Stock Limit | This is the lowest level your stock for this material can go before it gets marked as "low stock." If not present, it will default to 0. The largest value possible for this field is 9999999. |
| Preferred Vendor Name | [optional] This should be the vendor from which you purchase this material most often. If a value is found in this field, we will create a new Vendor in the system with this name. No expense records will be created due to information in this field. |
| Preferred Vendor Code | [optional] This can be used for any codes used by your preferred vendor to identify the material. |
| Zone | [optional] If you use the BIN Location feature for materials, this is the "zone" part of your code. |
| Position | [optional] If you use the BIN Location feature for materials, this is your code's "position" part. |
| Section | [optional] If you use the BIN Location feature for materials, this is the "section" part of your code. |
NOTE:
- For frequently used units of measurement (e.g., Oz, Lb), the conversion rate should be automatically set. For example, if the tracking unit is Oz and the purchase unit is Lb, the system should import the conversion rate as 1 Lb = 16 Oz.
- When entering the values for stating quantities, purchase to tracking unit conversion, and low stock limits, use only numbers or decimals (commas are not accepted).
Step 3: Export your spreadsheet to CSV
Once your spreadsheet is ready, you'll need to export it as CSV.
CSV stands for "Comma Separated Values," meaning that the export will contain your data in rows, with each column value separated by a comma.
The process to do this differs between spreadsheet programs. Instructions for some popular programs are as follows:
- Exporting an Excel Spreadsheet to CSV
- Exporting a Numbers Spreadsheet to CSV
- How to Save as a CSV from Google Sheets
Undoing a material import.
To remove your material import:
- Go to your Imported Files page. (How do I find my Imports page?)
-
All imports will now be listed. Hover over the ⋮ icon, and select Undo Import

Tip: Depending on your CSV file size, this may take a few minutes to complete. If any of the materials have been linked to an expense or recipe, they will be archived rather than removed. Any archived materials will not be imported again if they contain a material code, as this is how the system recognizes duplicate materials.