Add or remove an integration
The app integrates with popular e-commerce platforms, such as Etsy, Shopify, etc, so you can pull your existing products, variations, and orders to your account. Learn more about integrations here.
What We'll Cover
Add a new integration.
To add a new Integration to your account:
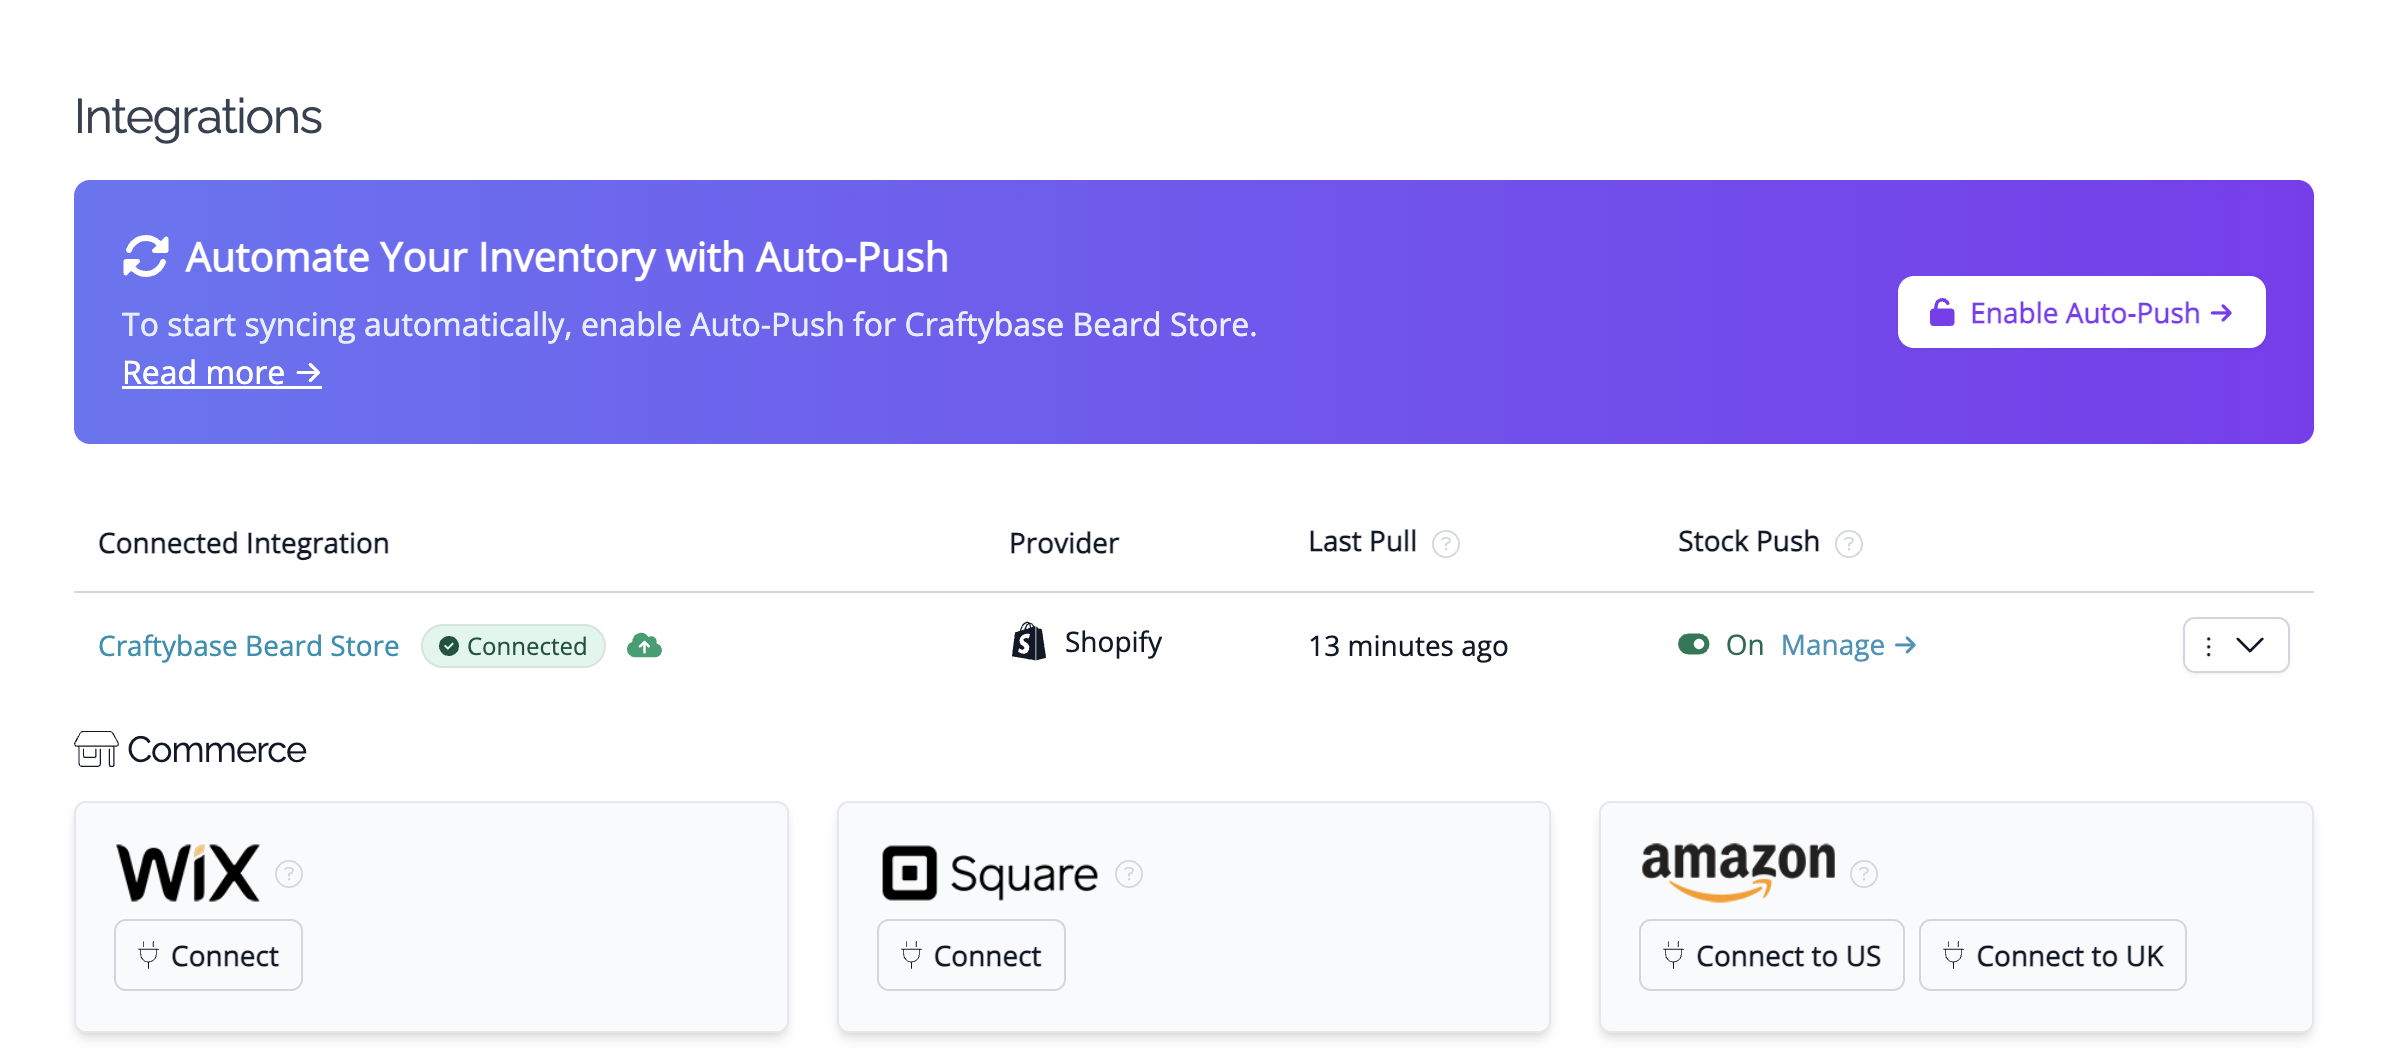
1. Go to your Integrations page (How do I find my Integrations page?)
2. On the page that appears, click the Connect button below the e-commerce platform you wish to add.

You may find that your current selected plan does not allow for more connections. If you upgrade your account, you'll find that more integration options will become available depending on the plan you selected.
Remove an integration.
To remove an integration:
- Go to your Integrations page (How do I find my Integrations page?)
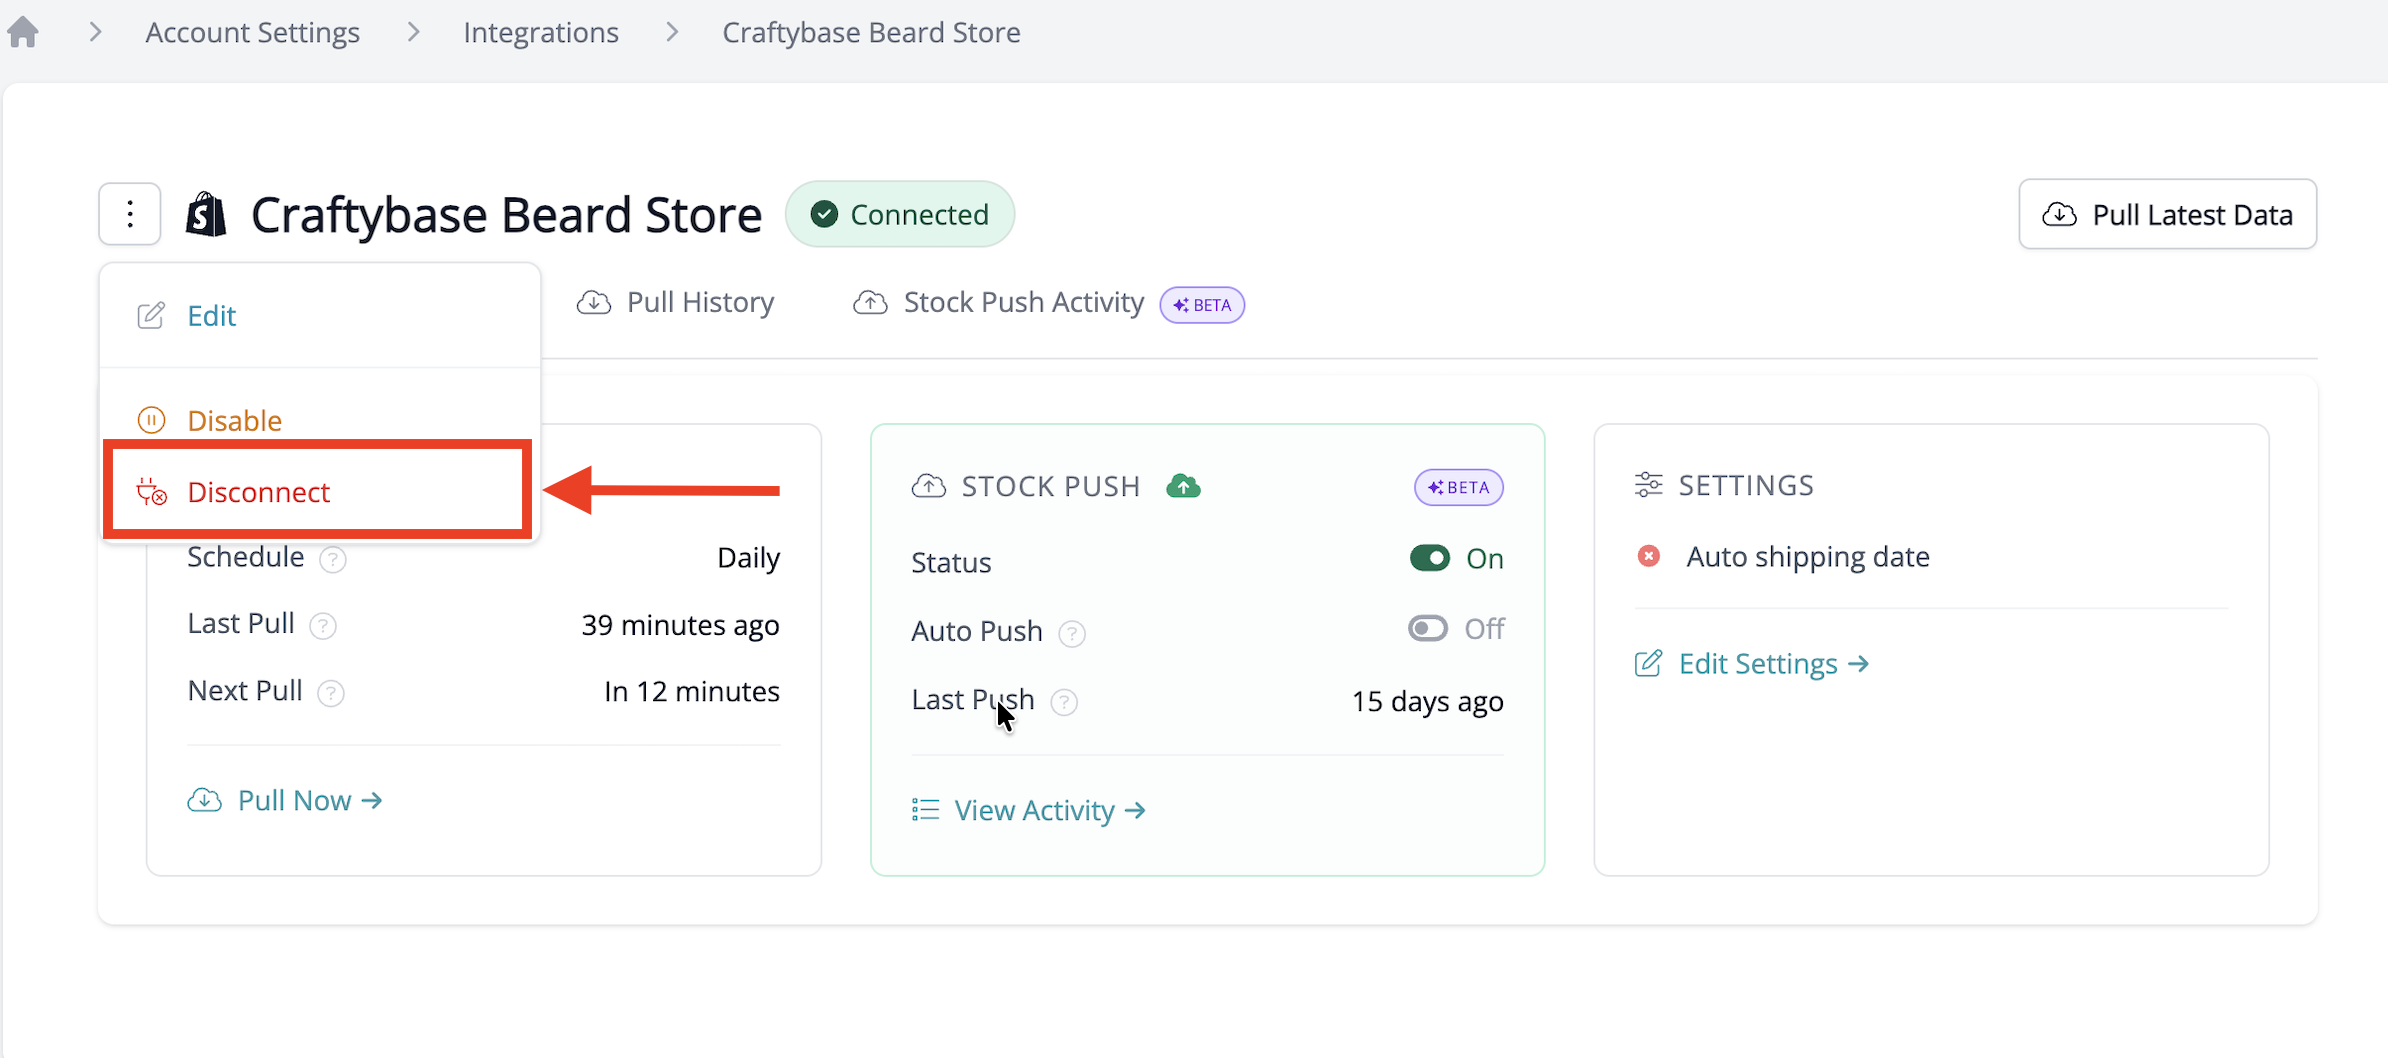
- Click on the Integration name that you wish to remove.
- Find the Disconnect button by hovering your mouse over the vertical ellipsis and select Disconnect integration. This will take you to a confirmation page showing a summary of what will be deleted: if you are happy with proceeding, click the Yes, Remove button.
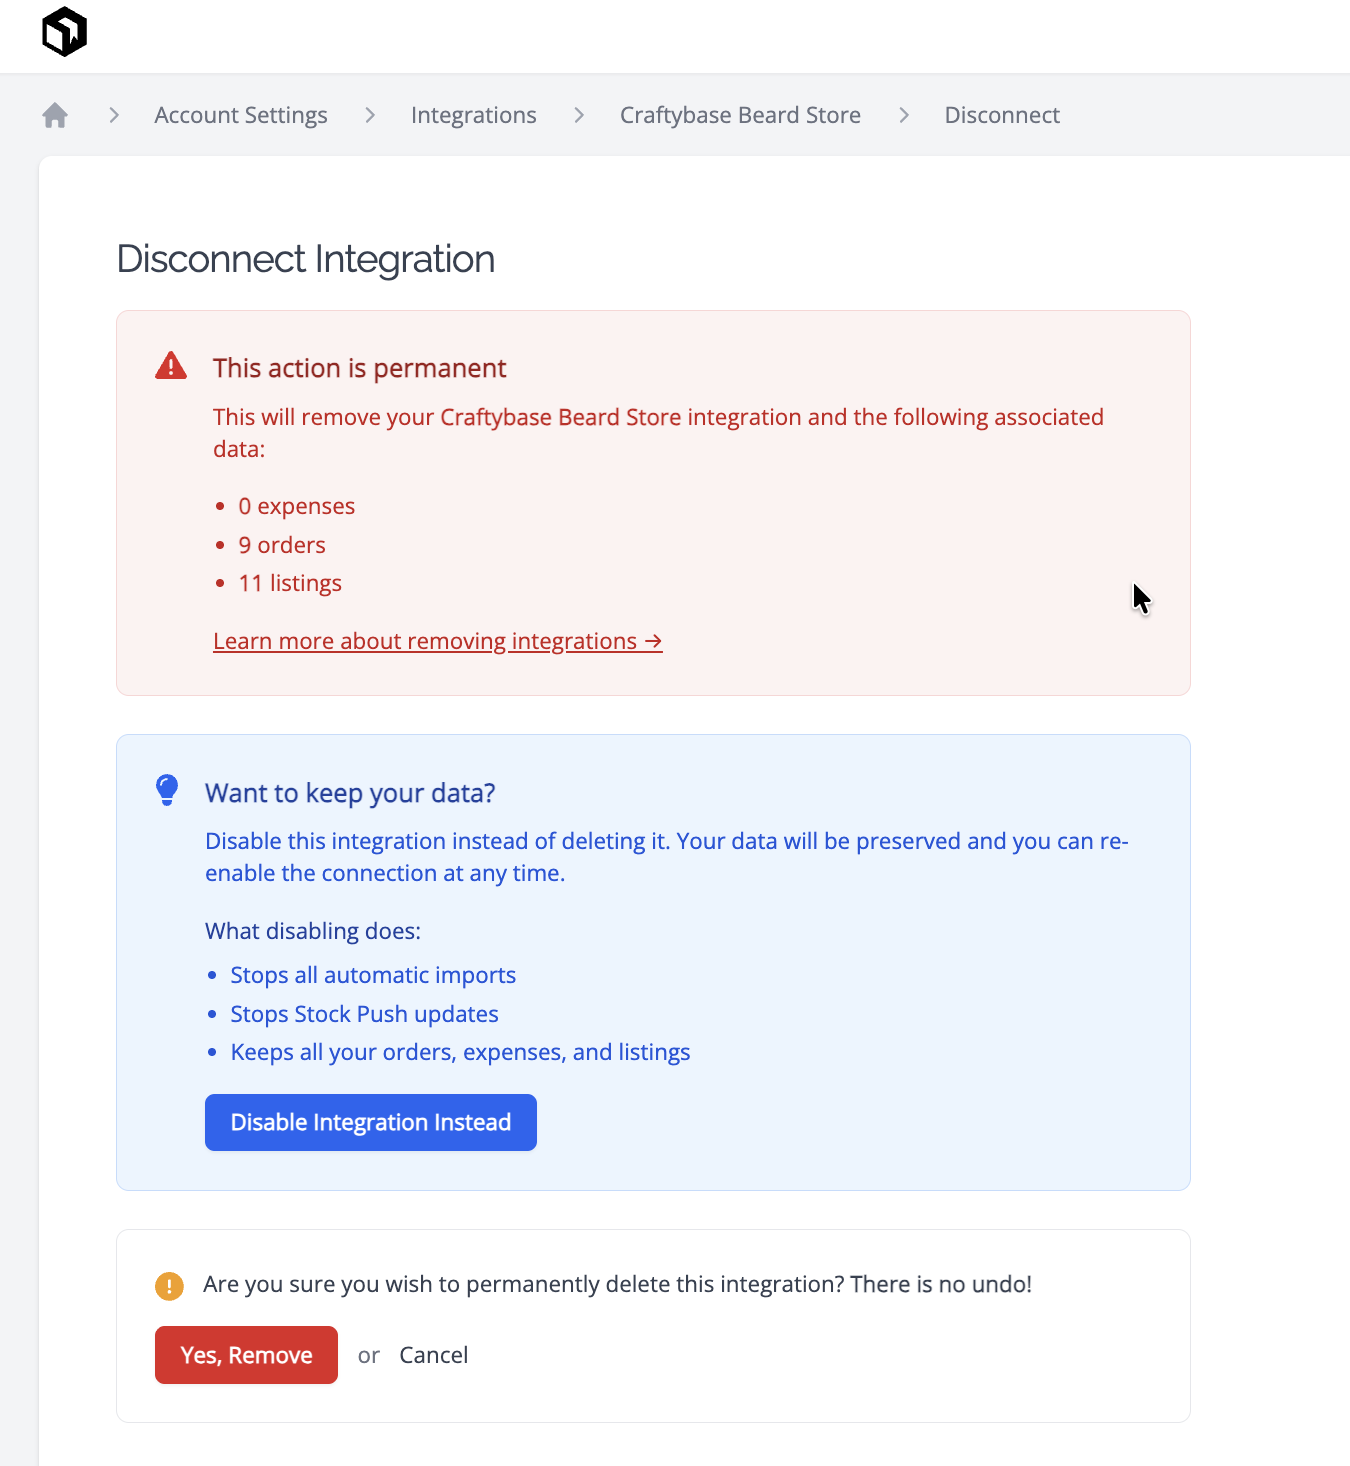
Removing an integration will also remove all purchases, orders, and listings pulled via the integration.
It will not remove any products or contacts created as they are not directly linked to any integration, nor will it remove any purchases or orders that were linked to an integration manually.