Pushing Stock Updates to Shopify
Automatically export your latest stock data to Shopify using our Stock Push feature.
This article will guide you through how to set up Stock push for Shopify and how you can use it to keep your inventory levels in sync across your connected integrations.
stock Push allows you to update your Shopify stock levels directly from the app. You can choose to send updates manually by default or, if you're on an eligible plan, enable Auto-Push so the app can push updates for you on a schedule.
With Stock Push enabled, the app becomes your "source of truth" for stock quantities, helping you maintain consistent inventory across all of your sales channels.
Our Stock Push feature is available in Indie+ plans.
In this article, we will cover:
- Why use Stock Push?
- How Stock Push works
- Enabling Stock Push for Shopify
- Viewing your Stock Push page
- How to manually push a stock update to Shopify
- Automating stock updates with Auto-Push
- Important things to note
- Troubleshooting
- FAQ
Why use Stock Push?
- Stay accurate across platforms - your stock levels in Shopify match the quantities you track in the app.
- Avoid overselling - if you sell something on another channel, update it here and then quickly push the updated quantity to Shopify, no fiddly multi-channel logins required.
- Flexible control over stock pushes - Choose whether to send updates manually or enable Auto-Push on eligible plans to automate updates.
- Clear inventory visibility - View your Stock Push page to get an overview of all differences between platforms
How Stock Push Works
If something changes your available stock for a product (for example, you record a manufacture, adjust stock, or an order is pulled), the app will automatically create a Draft Stock Push for that product.
From your Stock Push page, you'll see a draft push showing:
- The current calculated quantity in the app (this is what will be pushed)
- The current quantity pulled from integrations
- The difference between the two, for reference
By default, drafts wait for your review. If Auto-Push is enabled, the app will automatically push these updates at the next scheduled interval.
When a draft is pushed to an integration, it moves through the following statuses:
- Draft → created but not sent yet
- Queued → on its way to the integration
- Completed → successfully updated
- Failed → didn't go through (with a note explaining why)
Enabling Stock Push to Shopify
To enable and configure Stock Push to Shopify:
- Ensure you have a pre-existing account with existing and accurate stock levels in the app, alongside a Shopify shop connected as an Integration
- Go to your Integrations page
- Under your Integrations list, select the Shopify store you wish to push stock to.
-
Under the Stock Push column, toggle Status to on

-
On the following page, click the Authorize button if required and proceed through the reauthentication process
Note: This authentication process is only to obtain new permissions from Shopify to push data to your store. It will not impact any of your existing data or pulls.
- Select the Shopify Location you'd like to push stock to.

- Currently, the stock push feature supports only one location per shop.
- This cannot be changed once set. If you have selected the wrong location or need to change it, please get in touch to discuss options.
- Scroll down until you see Turn on Stock Push, and tick the box below.
- Select Save Settings to confirm your changes. Stock Push is now enabled and monitoring for changes in your stock levels.
Stock Pushes will only be sent automatically if Auto-Push is enabled (Business/Growth plans). Otherwise, you will push manually.
Viewing your Stock Push page
The Stock Push page gives you visibility into stock updates that have been created and sent to your integrations, as well as highlighting where stock levels differ between the app and your connected platforms.
To navigate to the Stock Push page in the app:
- From the top menu page, hover over the ⋮ option
- Select Stock Push

This will take you to the Stock Push tab, where you can find an overview of Draft, Queued, and Failed Stock Pushes across your connected integrations.

From here, you can also manage the settings for your connected integrations
Draft entries are created when stock levels don't match, making it easy to spot products that may need adjustment.
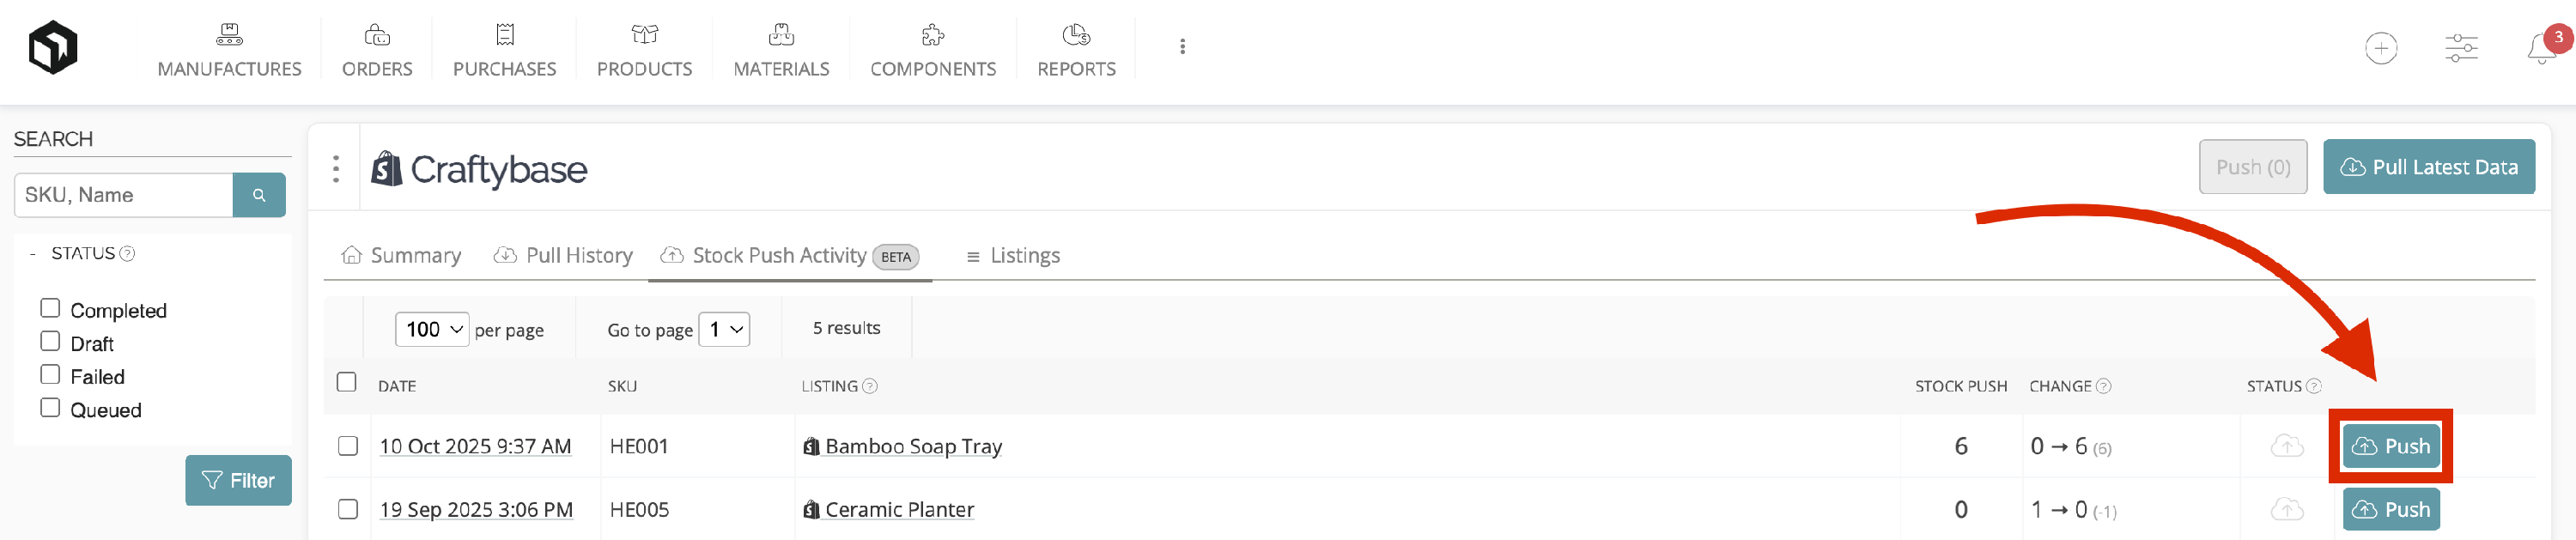
How to manually push a stock update to Shopify
Manual Stock Pushing lets you review and send stock updates to your integrations under your full control. This can be helpful when you want full oversight or you're preparing your account for Auto-Push.
To perform a manual Stock Push from the app:
- Navigate to the Draft tab within the Stock Push page
- Locate the Draft Stock Push you want to send to your Integration
- Confirm the stock quantity shown is expected
-
Click Push to send the updated stock level to your integration

Automating stock updates with Auto-Push
Auto-Push automatically sends stock updates from the app to your integrations on a set schedule, helping keep inventory accurate without ongoing manual work.
Why enable Auto-Push
- Keeps stock levels in sync across your integrations automatically
- Reduces the need to manually review and push updates
- Automatically maintains inventory accuracy across platforms
When Auto-Push works best
- Your inventory is accurate in the app
- You're confident in navigating Stock Push
- You want to move to a set-and-forget approach to ongoing stock updates
If you're still reviewing or correcting stock levels, manual Stock Pushes can help you get everything aligned first.
For detailed setup instructions and tips, see About Auto-Push.
Auto-Push is available on our Business or Growth plans.
Important things to note
- One draft per product at a time - if stock changes again before you push, the draft will update automatically.
- Negative quantities can't be sent - if your stock shows negative numbers, you'll need to fix the issue first.
- Single location only - currently, stock will only be pushed to one location in Shopify.
Troubleshooting
A few potential ways a Shopify Stock Push can fail include:
| Error | Action |
|---|---|
| INVALID_INVENTORY_ITEM | The selected item couldn't be found. It may have been deleted - check your product list or try again with a different item. |
| INVALID_LOCATION | This location no longer exists. Please contact support to update or restore it |
| INVALID_QUANTITY_NEGATIVE | Quantity must be zero or positive - negative values aren't allowed. |
| INVALID_QUANTITY_TOO_HIGH | Quantity is too high - must be less than 1,000,000,000. |
| INVALID_QUANTITY_TOO_LOW | Quantity is too low - must be greater than -1,000,000,000. |
| ITEM_NOT_STOCKED_AT_LOCATION | This item isn't stocked at the selected location. Add inventory to that location first in Shopify. |
| NON_MUTABLE_INVENTORY_ITEM | This item can't be adjusted - try adjusting the stock levels for each child product instead. |
How can I fix the "ITEM_NOT_STOCKED_AT_LOCATION" error?
The "ITEM_NOT_STOCKED_AT_LOCATION" error can be fixed by adjusting the inventory in Shopify to track an Item at a certain location. This can be done in two ways;
Adding an item to a location:
- For reference, note the location you have set up Shopify stock push to. This can be found in your Shopify connections Stock Push Settings page: How do I find my Stock Push Settings page?
- In Shopify, navigate to the product you wish to track at a new location
-
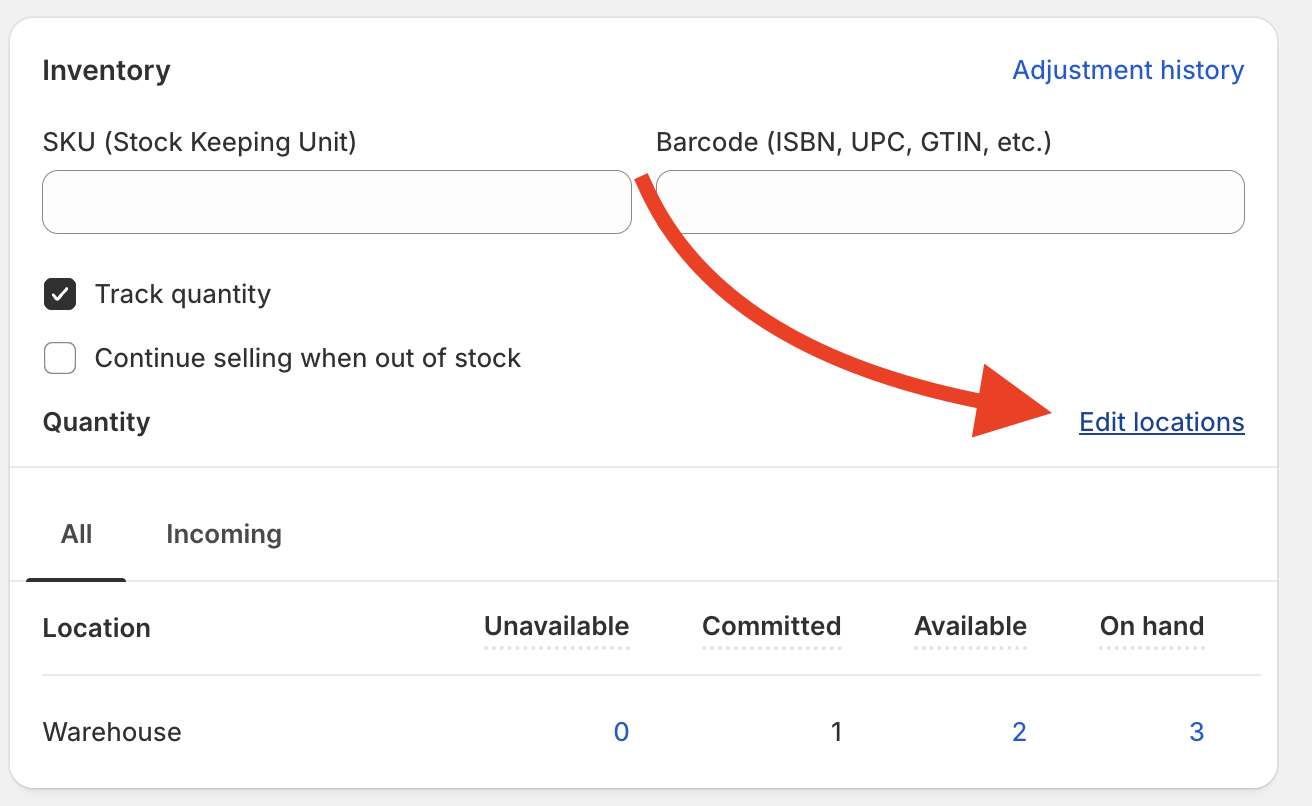
Scroll down, and navigate to the locations tab, select Edit Locations
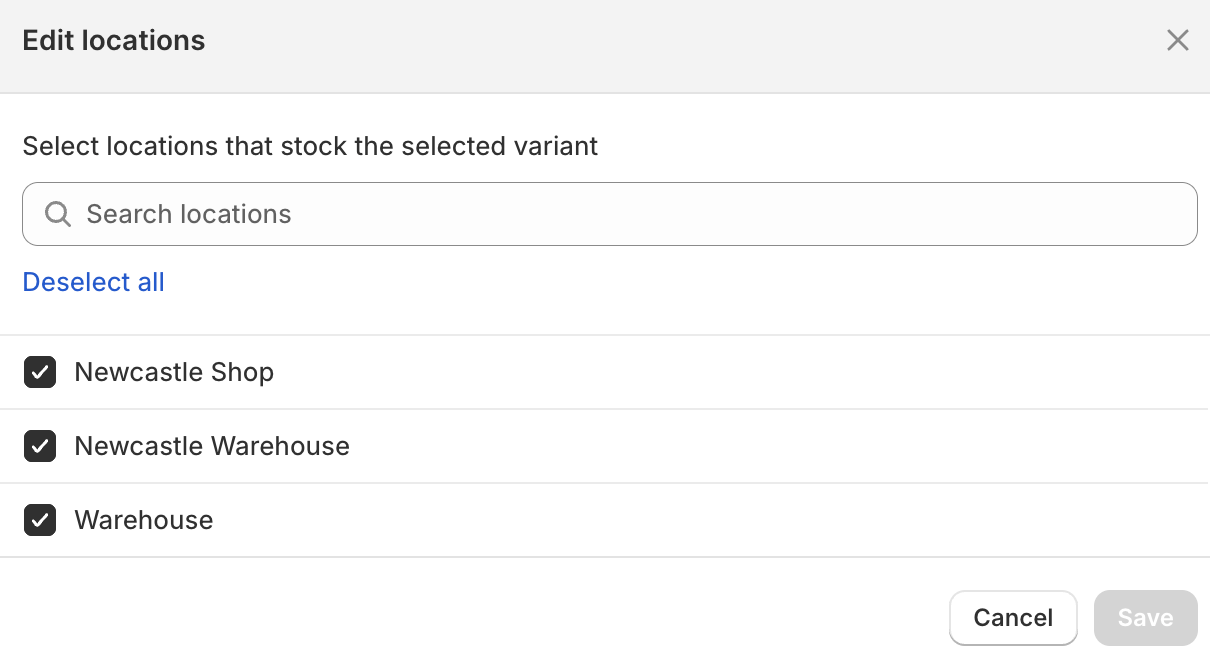
-
Select the location that matches the location stock is selected to push to from the app, and save.


This will now stock the item at your pushed location and resolve the error.
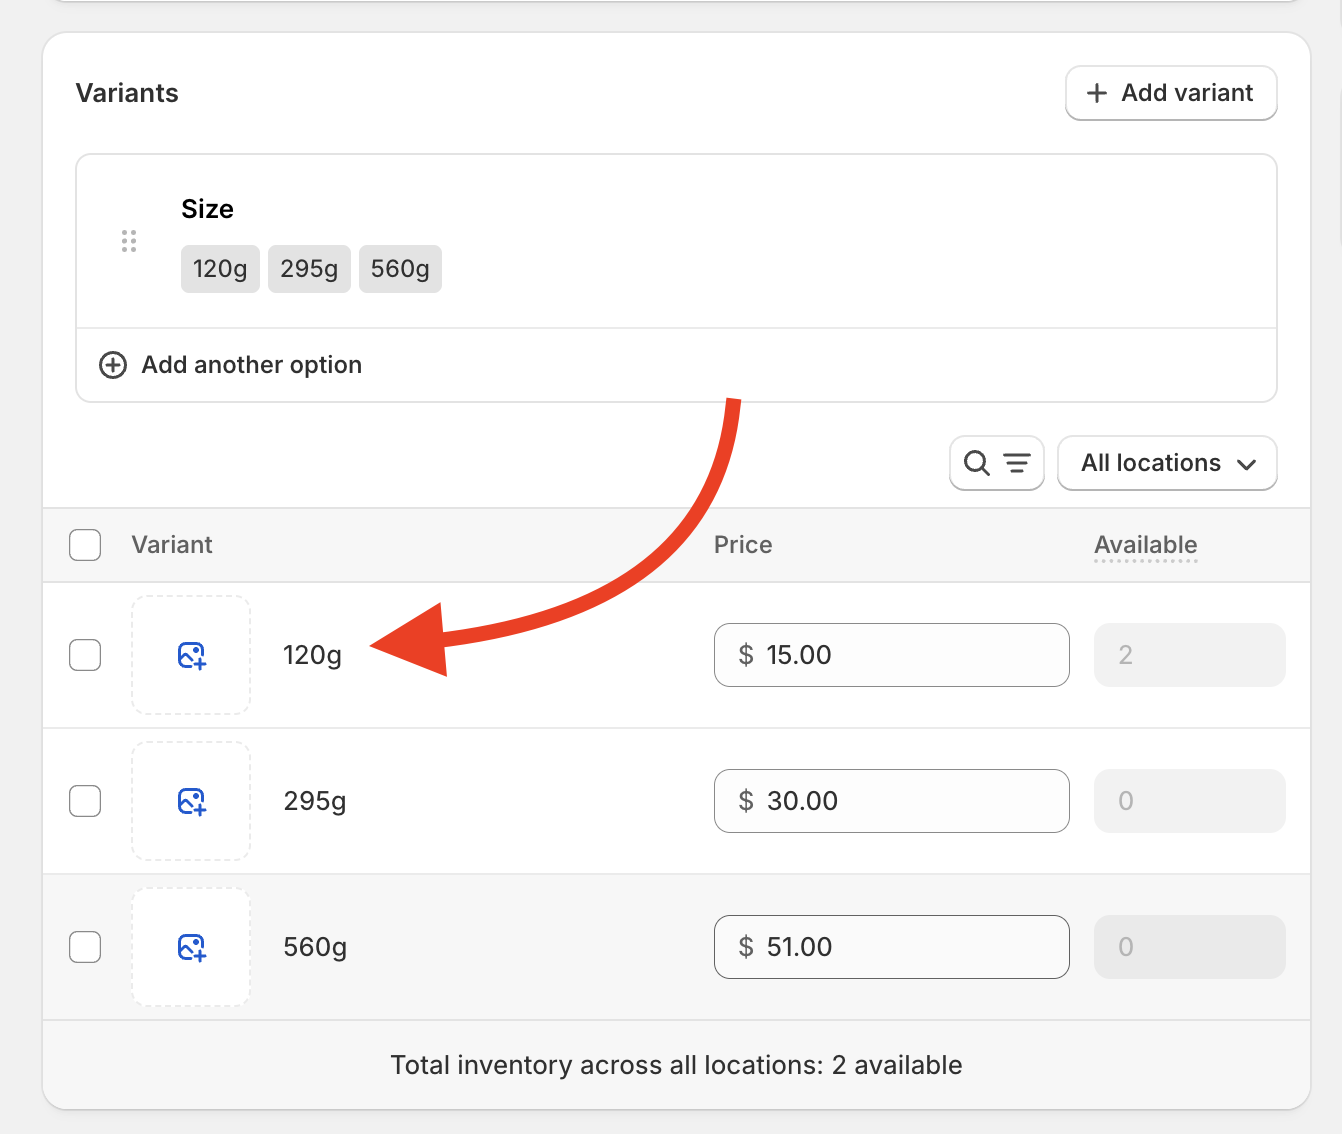
Adding an item variant to a location:
- In Shopify, navigate to the product variant you wish to track at a new location
-
Scroll down, and navigate to the Variants tab, select the variant you wish to track
-
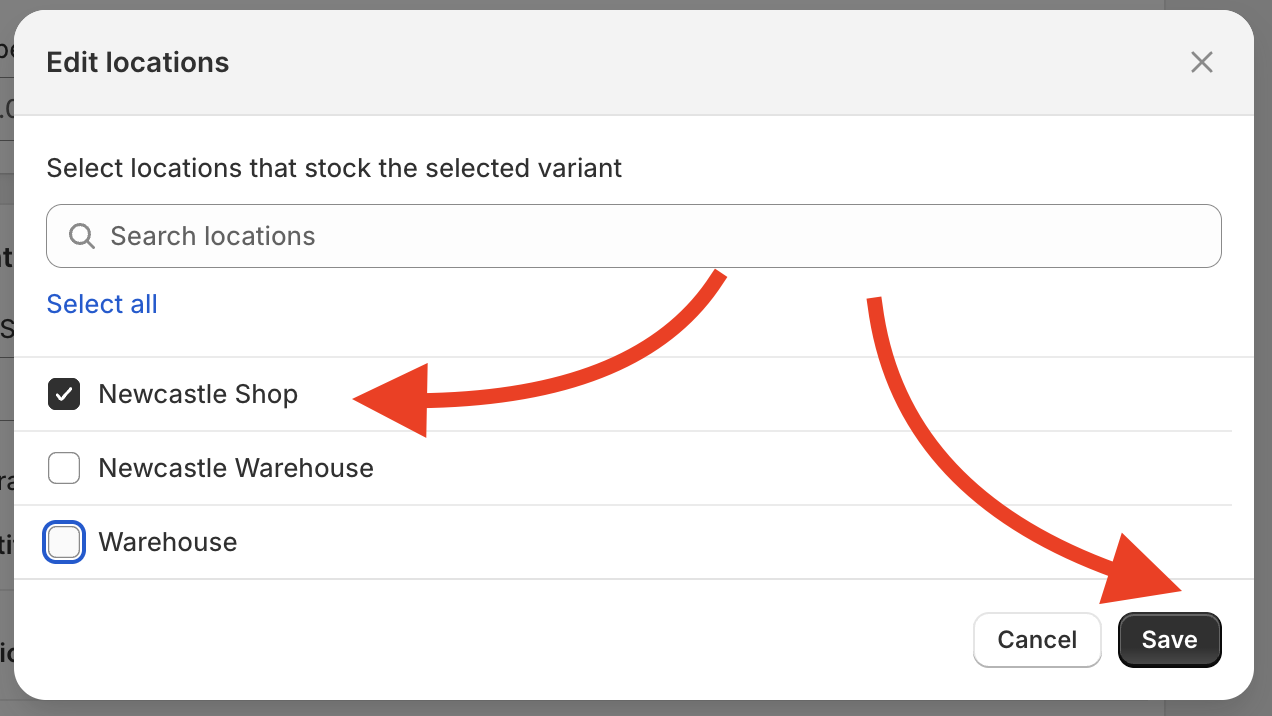
On the new page, navigate to Quantity, and select Edit Locations
-
Select the location that matches the location stock is selected to push to from the app, and save


This will now stock the item variant at your pushed location and resolve the error.
FAQ
Can I push stock to multiple locations?
Not yet. Currently, you can only select and push to one location per Shopify store. However, you can push to multiple Shopify stores.
Can I change my stock push location after initial configuration?
No, not at this time. Please contact our support team for assistance.
How can I view my Stock Push history?
You can view push attempts and results in the Stock Push tab under Listings.
Why are some of my products not appearing in the stock push tab?
Only active products will be pushed to Shopify. If you don't see a product in the stockpush menu, it's likely that the product has been archived. To fix this, double-check the product's status and reactivate it if necessary. Once active, it will appear in the stockpush menu.
How are products with decimals pushed to Shopify?
Shopify does not support tracking inventory in decimal quantities, it only allows whole numbers. Because of this, when product quantities that include decimals are pushed, the value will be rounded down to the nearest whole number before pushing to Shopify.
Example: If the app shows 136.8 units, the quantity pushed to Shopify will be 136 units.
Need Help?
Still have questions about setting up your Shopify shop for Stock Push? Please get in touch, and we'll be happy to help.