TUTORIAL: Introduction to Products
If you have connected to an e-commerce integration, you'll notice that most of the work has been done for you. However, it's still a good idea to be aware of how products fit into the system so you can adapt them to match the way you want to track your stock.
In this tutorial, we'll cover:
- What are Products?
- Pulling from an Integration
- Adding Products Manually
- Sections in the add product page
Time to complete: Around 35 minutes
What are products?
A Product in the app is any item you sell directly to a customer. Products act as the central hub for managing everything related to what you sell, from tracking sales, expenses, and manufactures to monitoring stock levels and variations.
Each product in the app gathers all related data so you can quickly understand how much you've sold, manufactured, and have on hand.
Products can be:
- Pulled via an integration
- Imported in bulk using a spreadsheet
- Manually created one at a time
Pulling from an Integration
The app integrates with platforms like Etsy, Shopify, Square, and PayPal. If you've already connected an integration during setup, you may see your products already populated.
If not, you can connect your Integration at any time on your account settings pages. Once you have connected your integrations, you can then pull your product data into the app. This will create products on your behalf for all matching products found in the Integration.
Your pulled product names will be sent directly from the title of your pulled product. You can change your product name to represent the product better if you wish - this will not affect any linkage between your external product and the app.
Depending on how you have structured your product listings on your Integrations, you may find that after your first pull, you wish to restructure the pulled products to suit your manufacturing workflow better. You can merge together products within the app - this retains the linkages of all merged products so that future sales and expenses will be associated correctly. Merging is also great for situations where you have multiple Integrations and wish to combine the listings on each integration to represent a single product on the app.
Adding Products Manually
While pulling your products from your integration or via a CSV file is the quickest and easiest way to add your Products to the app, you can also add a product to the app manually using the steps below:
-
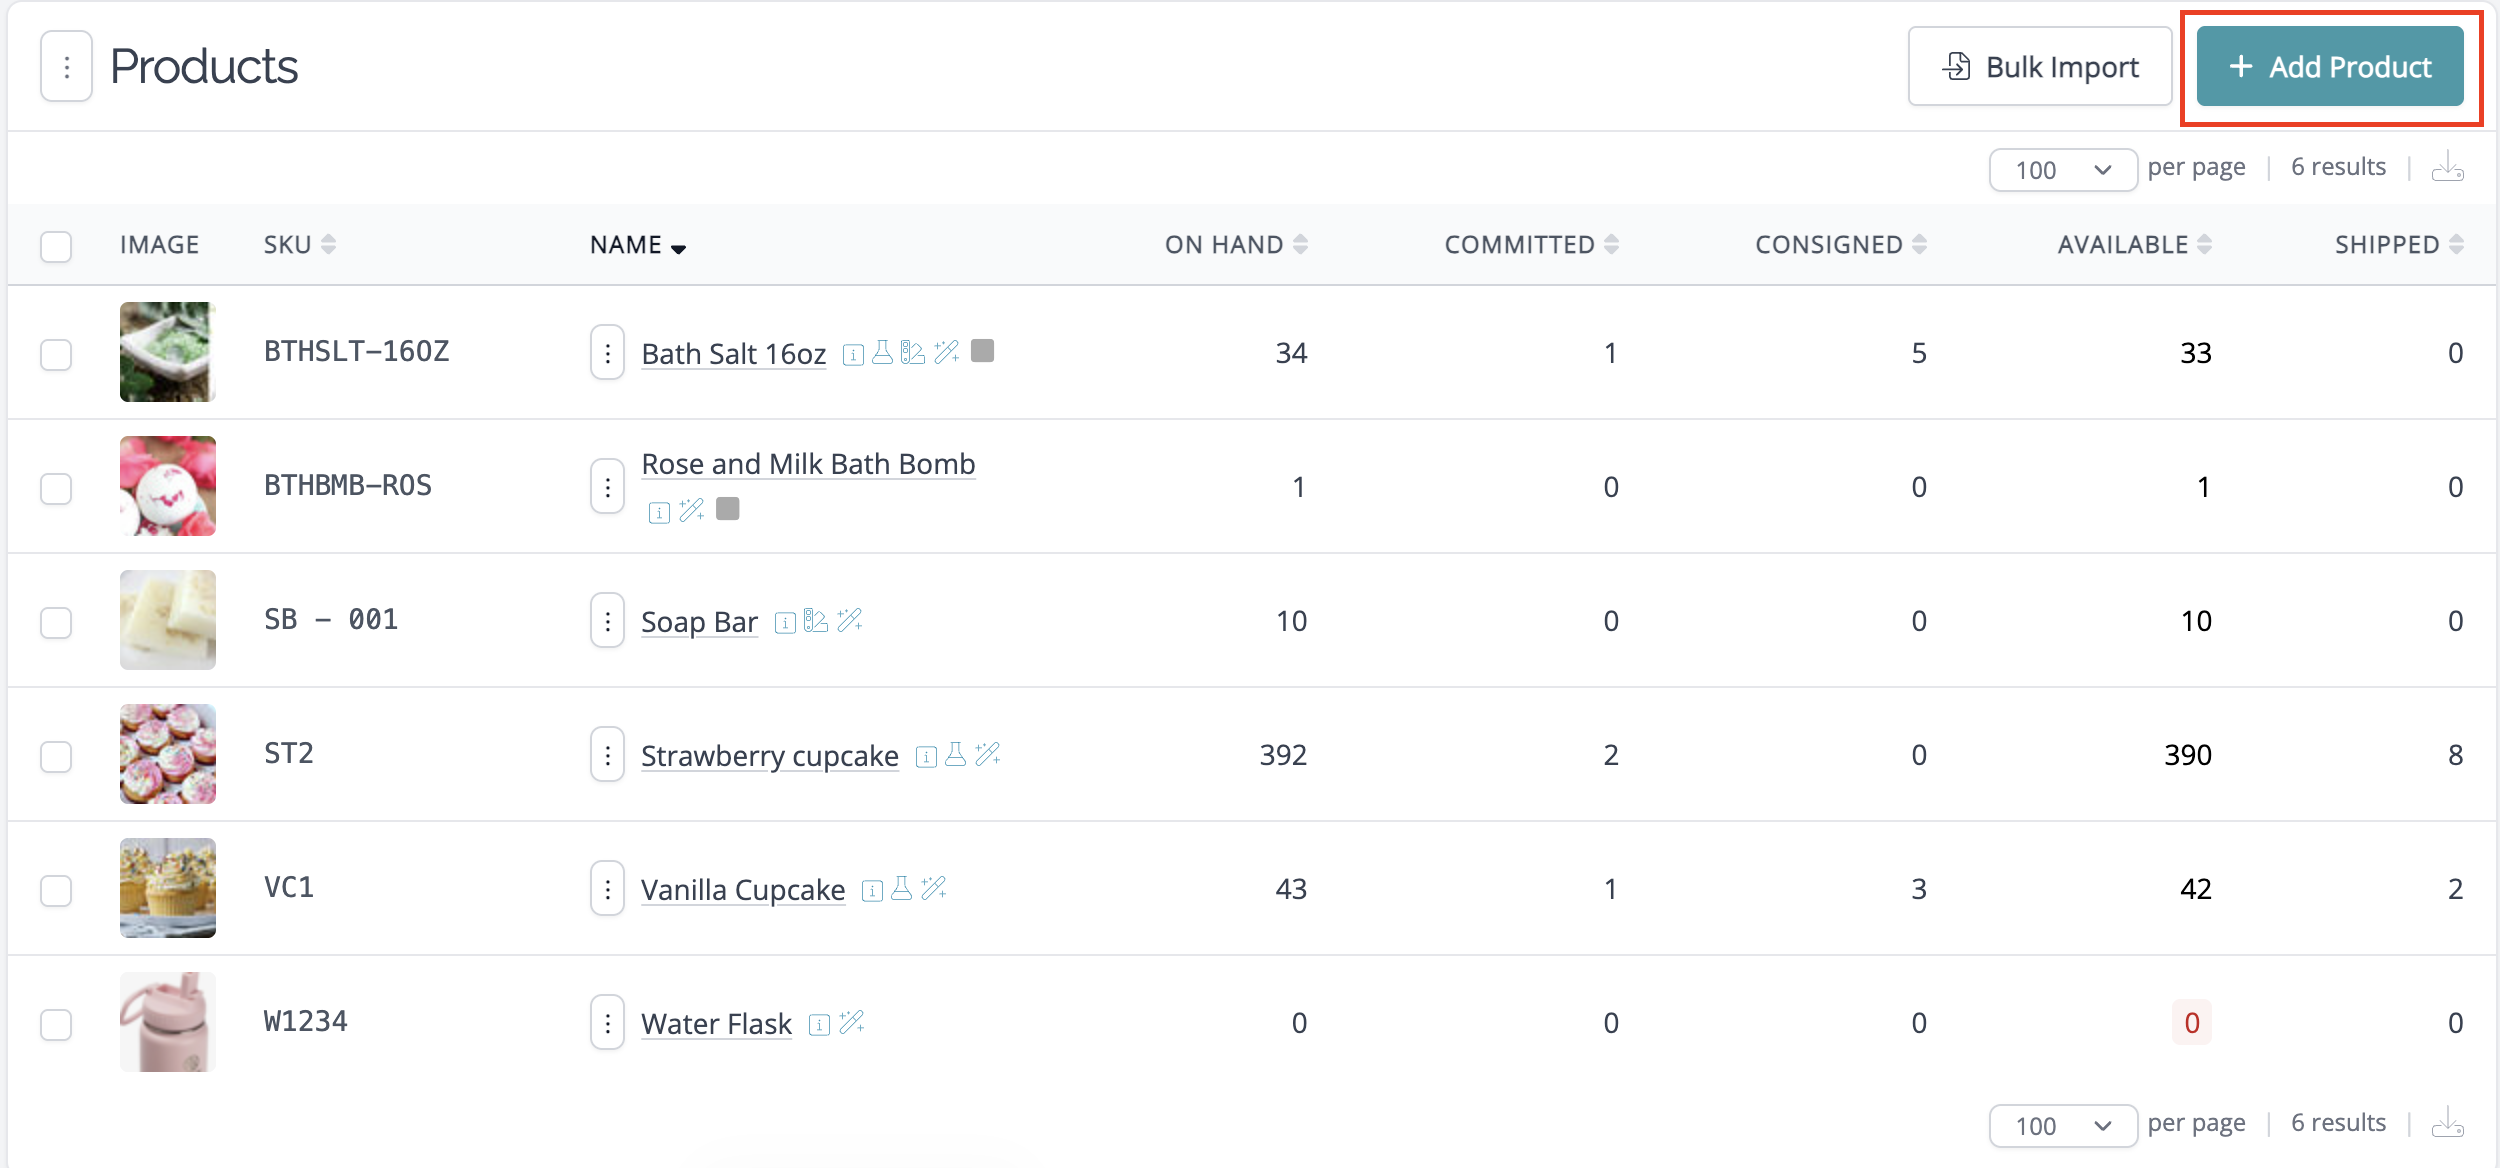
Click on the Products tab to get to your Products List:

-
Click the "+Add Product" button that appears in the top right-hand corner of the page.
-
You'll land on the Add Product page


Sections in the add product page
Let's take a closer look at the fields and options located on the Add New Product form.
- Basic Information
- Name: This is the title of the product that you'd like to use for your inventory tracking purposes.
- SKU: If you use stock-keeping codes to identify your products, you can key them here. These codes are fully searchable in the system, making it a quick way to find your products without typing the full name. SKUs can include additional characters such as &, +, -, ., and _.
-
Image: This allows you to upload an image that represents the product. This is optional, but it can be a good way of quickly identifying your product in your lists. It is also displayed on your invoice view, so if you intend to use this feature, then you may wish to consider uploading images.


- Sales Information
- Auto Manufacture: If you'd like a manufacture to be created automatically each time an order is pulled/added to the app, then you'll want to tick this box. (More information about Auto Manufactures can be found here: How does the Auto Manufacture feature work?)
- Low Stock Limit: This allows you to define the minimum quantity of this product that should be in stock before it is marked with a stock status of "low stock." This is a helpful way to stay on top of low stock levels and avoid running out unexpectedly.
-
Default Sale Price: This is primarily used to set the default price for manual orders, but it also helps when reviewing your Pricing Guidance by showing the profit and markup based on this price.


- Starting Adjustment
If you are moving from another inventory system, you can "bring forward" your unit price and stock level and then work forward from the date you moved across. Alternatively, to backdate everything since you started your business, leave all fields in this section as zero and then add your past orders and manufactures to bring your stock up to current levels.
- Starting Quantity: This will be recorded as a Starting Adjustment for the product and will be set as your current stock on hand for this Product. Any Manufactures or Orders you add after this point will increase and decrease this number accordingly.
-
Material Unit Cost: This field is for setting the material value of any stock you are bringing into the system without accounting for them via orders or manufactures. Do not include internal labor costs or overheads here.
If setting up the inventory, please note that you'll need to ensure that these are accurate costs, as all rolling calculations going forward will include the information you provide here. We strongly advise reading our Quickstart eBook before setting any starting adjustments to ensure that you are not double-valuing your stock.


- Additional Details
This optional section allows for deeper customisation and organisation:
- Category: Use this to segment or classify your product. It is optional, and you can set this later via the edit product form if you wish. You can either select from your list of existing categories or add a new category.
- Description: You can use this section to add notes or any additional information about the product. These notes are not displayed on invoices, so this is a field for your use only.
-
State: The state selection box has three available options: Active, Draft, and Archived.
Active is the default status and should be selected when you're ready to include the product in your main product list.
If the product isn't ready for sale yet, for example, if you're still developing it, you can set it to Draft to keep it separate from your active inventory. This is especially useful for prototypes or products in testing.
Archived is best used for products you've sold in the past but no longer make. Archiving removes the product from most views and searches within the app, but you can still access it through filters on your Products page if needed.
- Measurement Type: This field lets you define the unit of measurement for the product. For many items, the default "item" label may be sufficient, but you can also choose a more specific term if it better suits your product, for example, jar, bar, scarf, bracelet, roll, or basket.
-
Sale Quantity: This field lets you specify how many units should be deducted from your inventory each time a sale is recorded. For example, if you sell Soap bars in packs of 2 bars, you would set the sales quantity to 2. That way, whenever an order is added or pulled, the app will automatically reduce your stock by two units.


Once you've keyed all details to your satisfaction, click Save Product to complete, or Save Product & Add Another if you're entering multiple orders.
Need Help?
Still have questions about setting up your products? Please get in touch, and we'll be happy to help.