TUTORIAL: Introduction to Manufactures
Learn how Manufactures work within your account
This article will guide you through how manufactures work in the app and how they help you track
production, stock levels, and costs.
Manufactures are the backbone of your production workflow in the app. They track every batch you make, adjust your stock automatically, and calculate your production costs – all in one place. Whenever you create new product stock, a manufacture records what was made, what materials were used, and how much it cost you to produce.
In this tutorial, we'll cover:
This tutorial should take approximately 20 minutes to complete.
What are Manufactures?
A Manufacture in the app is a production record you create whenever you make a batch of a product or variation. It shows exactly how raw materials were converted into finished stock and ensures your inventory reflects the true cost and quantities of what you've made.
Each manufacture will:
- Increase your product stock automatically
- Decrease your material stock based on the amounts used
- Calculate your batch cost, including labour if added
- Provide a complete, auditable history of your production and COGS
Think of a manufacture as your paper trail for every batch made.
Ways to Add Manufactures
You can add a manufacture from either your product page or the main Manufactures page. Let's walk through how to create one for a product called Lavender Soap.
Adding Manufacturers from Your Product Page
- Go to your Product List. (How do I find my product page?)
- Hover over the ⋮ icon next to the product name.
- Select Add Manufacture.
This opens the Manufacture form with your product pre-selected.

Adding Manufactures from your Manufactures Page
- Navigate to Manufactures using either the top menu or the overview page. This will take you to the Manufactures list.
- In the top-right corner, click Add Manufacture.
- This will take you to the Add Manufacture form.
If you frequently produce the same item, creating a recipe first will save time by auto-filling your material list.
Creating a Manufacture
Once you're on the form, you'll see several sections designed to help you record all the important details about your batch.
Add Manufacture Form
Let's take a closer look at the fields and options located on this page.
Basic Information
- Code: the app generates a unique code automatically, but you can override this if you use your own batch numbering system
- Assignee: Select a team member to assign the manufacture to. This helps you track who completed each batch
- Product Made: Confirms the product or variation being manufactured

Production
- Production Status: Lets you indicate the current stage of your manufacture
- Not Started - Planning phase only, no stock adjustments are made.
-
Work In Progress - Indicates the batch has started. This unlocks the Picklist view in the Materials section so you can prepare material usage before completing the batch.
- Completed - Finishes the manufacture and updates stock by deducting materials, increasing product stock, and finalising batch costs (including labour if added)
- Created Date: The day production began
- Completed Date: The day the manufacture was finished and the inventory changes take effect
- Planned Quantity: This is how many units you plan to make. Based on your recipe's batch size, the app will auto-calculate material use and product output
- Actual Quantity: The quantity you actually made


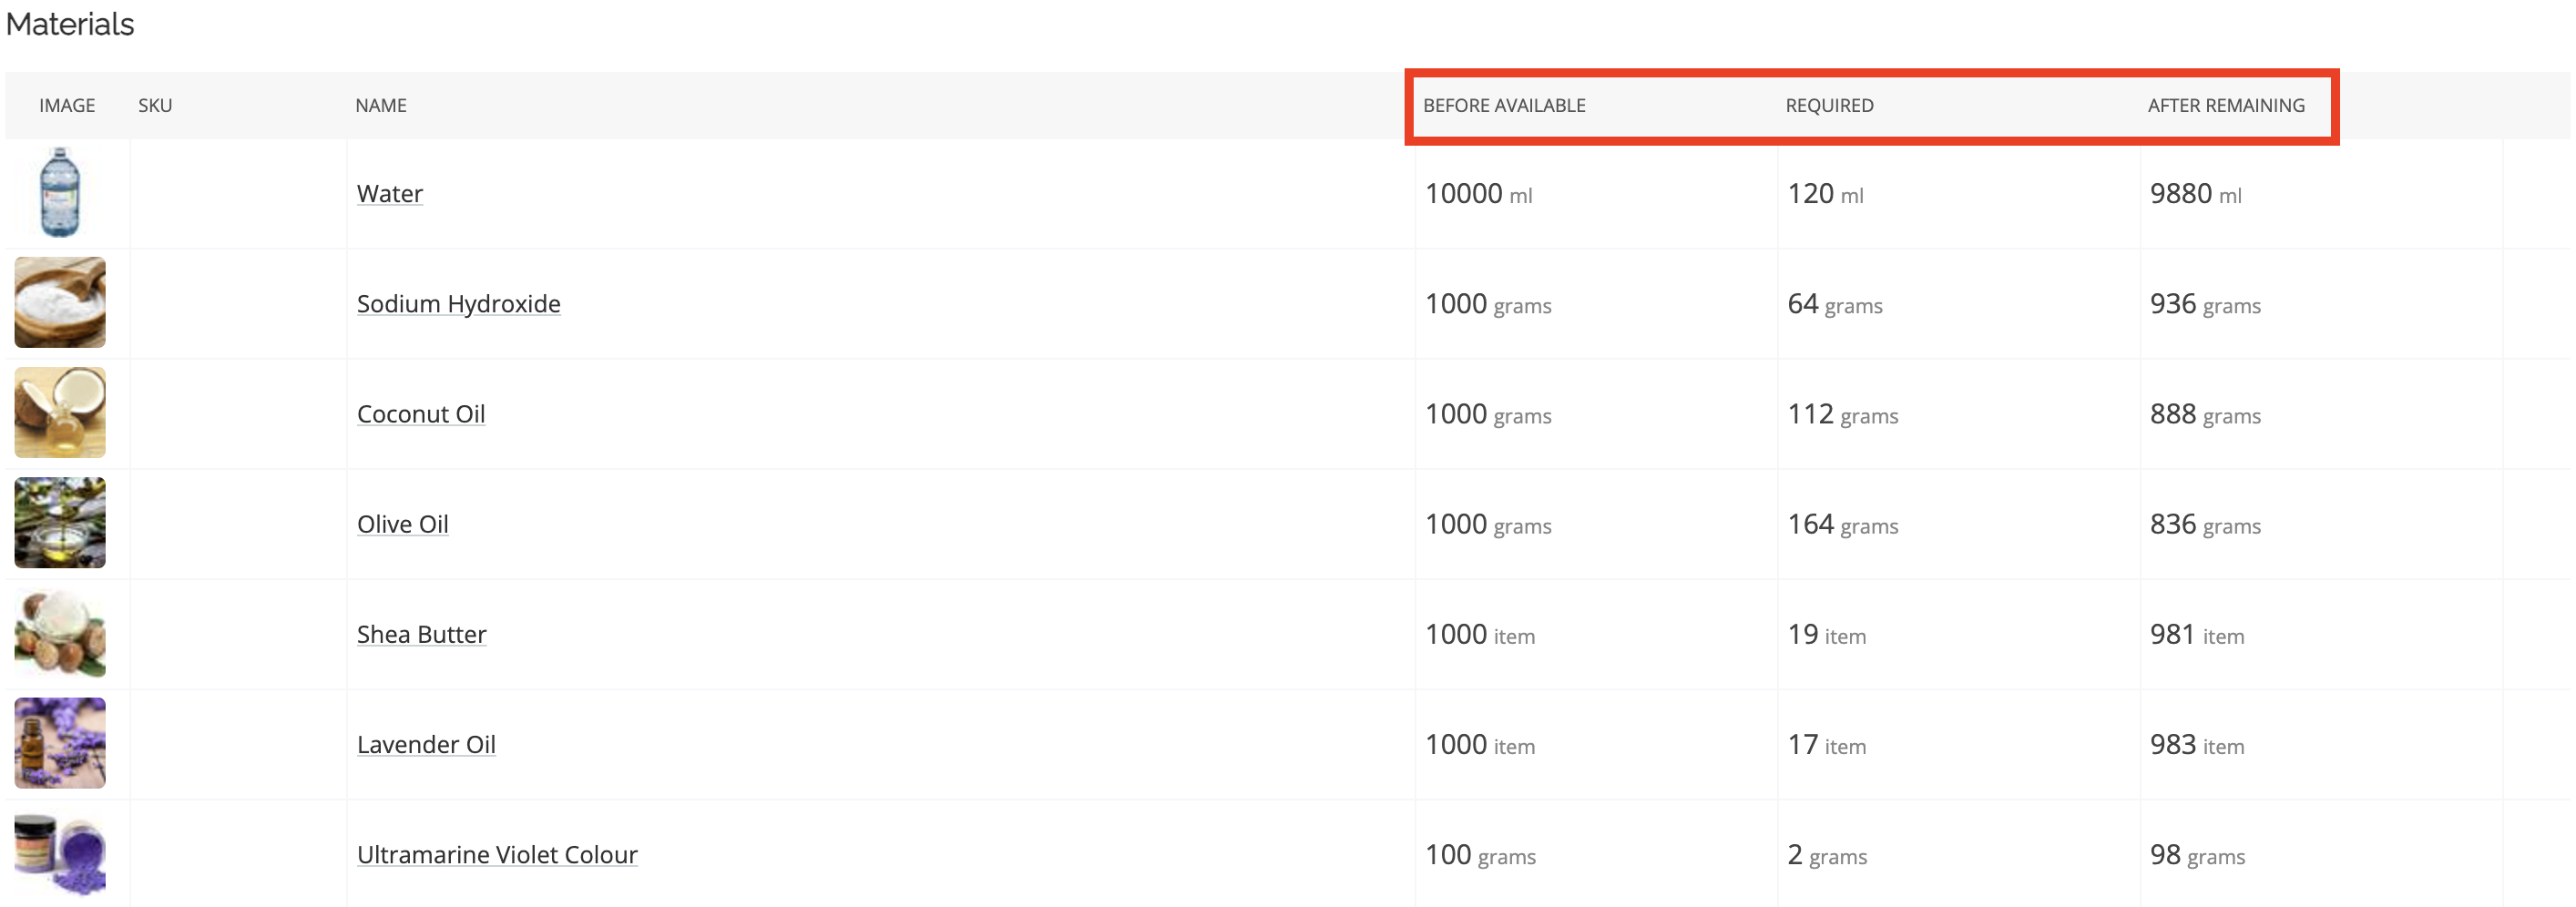
Materials
This section is where you tell the app exactly which materials were used to make your batch. These fields determine how much material stock is deducted and how your manufacture costs are calculated.
If your product has a recipe, the app will automatically populate this list for you with each inventoriable material, including its name and image for easy identification.
- Material: Shows the name of the material being used. Includes the image and title of the material for easy identification
- Quantity: The exact amount of the material used in the batch
- Lot: If you track material lots, select the specific lot used for this batch from the dropdown
- + Add Material: Use this button to add a material that isn't listed

Additional Details
- Deadline Date: Target completion date for the manufacture
- Expiry Date: When this particular batch will expire. This value will then appear on batch records and reports
- Total Labor Time (Internal): The total number of minutes you spent making the batch. The app will automatically calculate your internal labor cost using your preset hourly rate.
- Notes: Add any notes or extra information not covered elsewhere

Once everything looks good, click Save. If the status is set to Completed, the app will now:
- Increase your product stock
- Deduct materials used
- Update costs
Wrap-Up
That's it! You've successfully created your manufacture and learned how to record batches within the app.
Next, you can:
- Record any manufactures as you restock
- Add or update a product's recipe
Want to learn more?
Check out these related articles:
Need Help?
Still have questions about setting up manufactures in the app? Please get in touch, and we'll be happy to help.